
Step 1 - Generating Avatar using “Avatar SDK Demo”
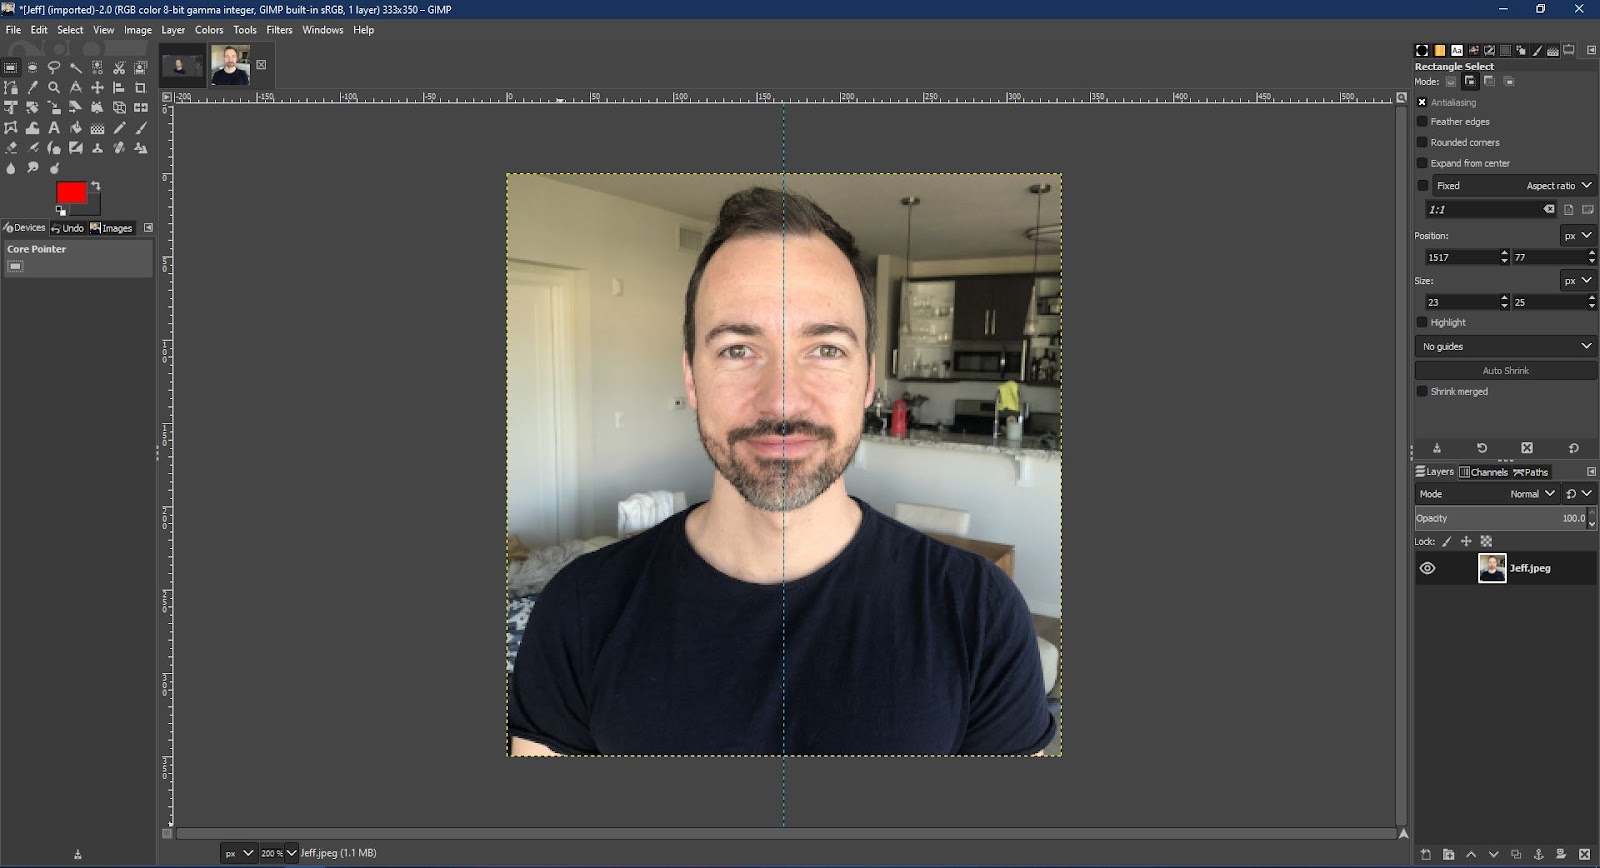
Open the photo in GIMP and under the “Image” menu under “Guides” select “New Guide (by Percent)” and create a Vertical Guide exactly at the center. Using the “Move Tool” place the face exactly at the center and export the image as a jpg file.
Note: This will minimize the offset of the generated avatar.
Generate the avatar in “https://webdemo.avatarsdk.com/” using the center aligned photo. It will generate an obj file (model.obj) and a texture file (model.png).

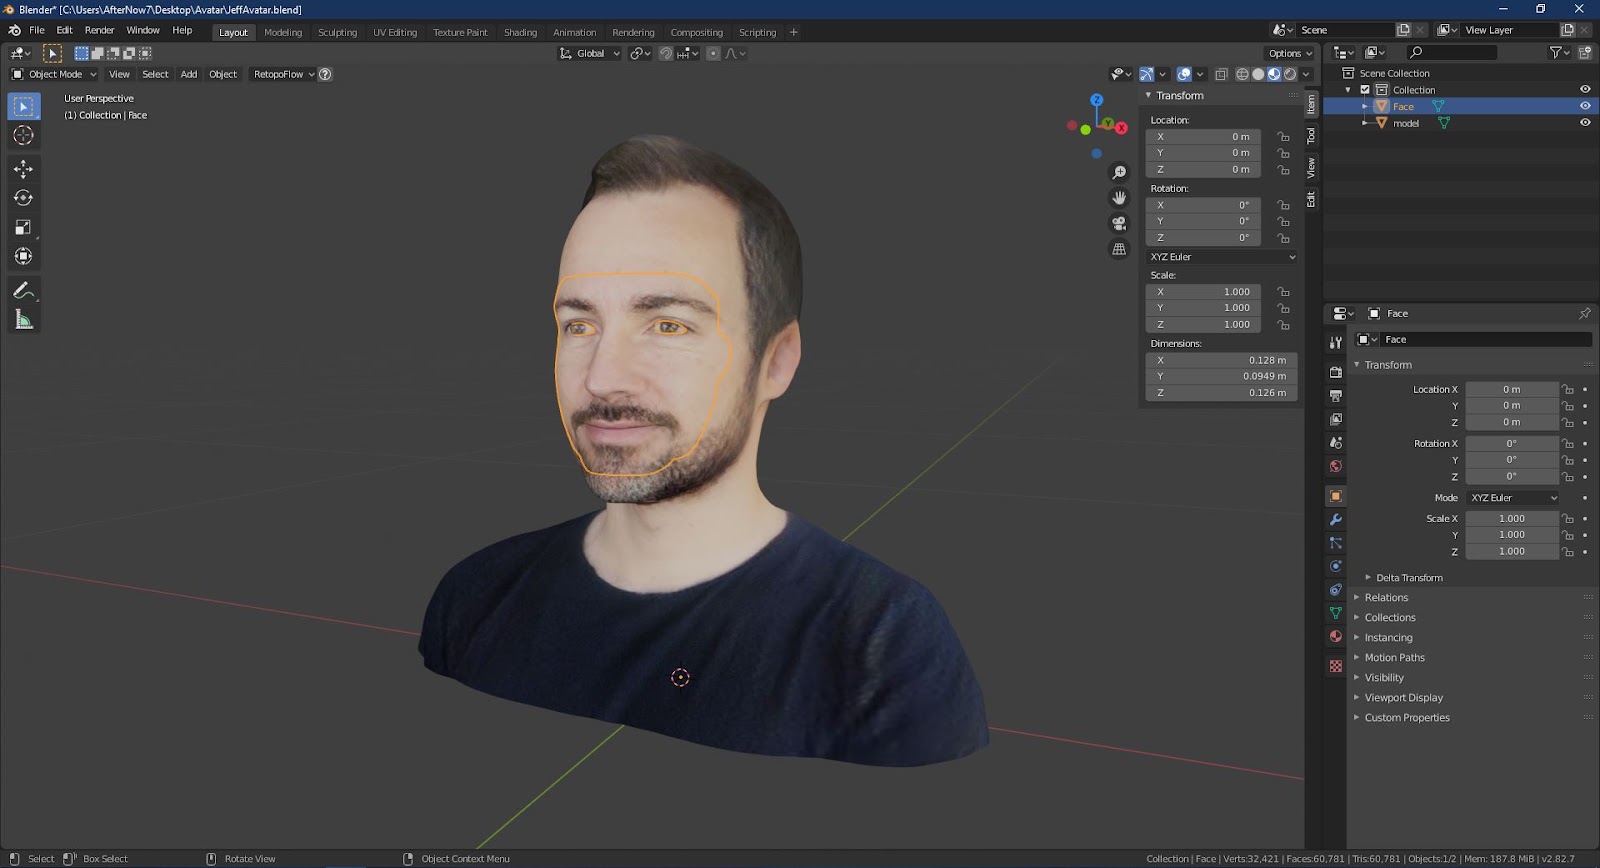
Open Blender and delete everything in the scene. Import model.obj in Blender and change the viewport shading to Material Preview to view the model with texture. Save the file with an appropriate name (“JeffAvatar.blend” in this case).
Note: The default name of the object is “model”.

Step 2 - Remeshing the Face
The mesh generated is triangulated which needs to be remeshed for better rigging and reducing polycount. In the Front Orthographic view of the 3D Viewport select all the faces of “model” in Edit Mode and move up in the Z axis so that the mesh is positioned just above the grid and also move the mesh in the X axis to align the centerline of the face with the Z axis if it is offset. In Object Mode in the 3D Viewport under “Object” menu click on “Apply” (Shortcut “Ctrl+A”) and apply “Rotation” as “model” has 90° rotation in the X axis.

In Edit Mode select the face (which is not attached to the rest of the body) and make a duplicate of it and save it as a different object leaving the original model intact (which will be needed as reference for retopology of the head and body and texture baking) and name it “Face”. In the Properties panel under Object Data Properties name the Mesh Data to “Face” to stay organized.
Select “Face” and in the 3D Viewport under “Object” menu click on “Shade Smooth”. Remove the default material (material_0).
Note: The smooth shading can be seen clearly by changing the viewport shading to Solid.
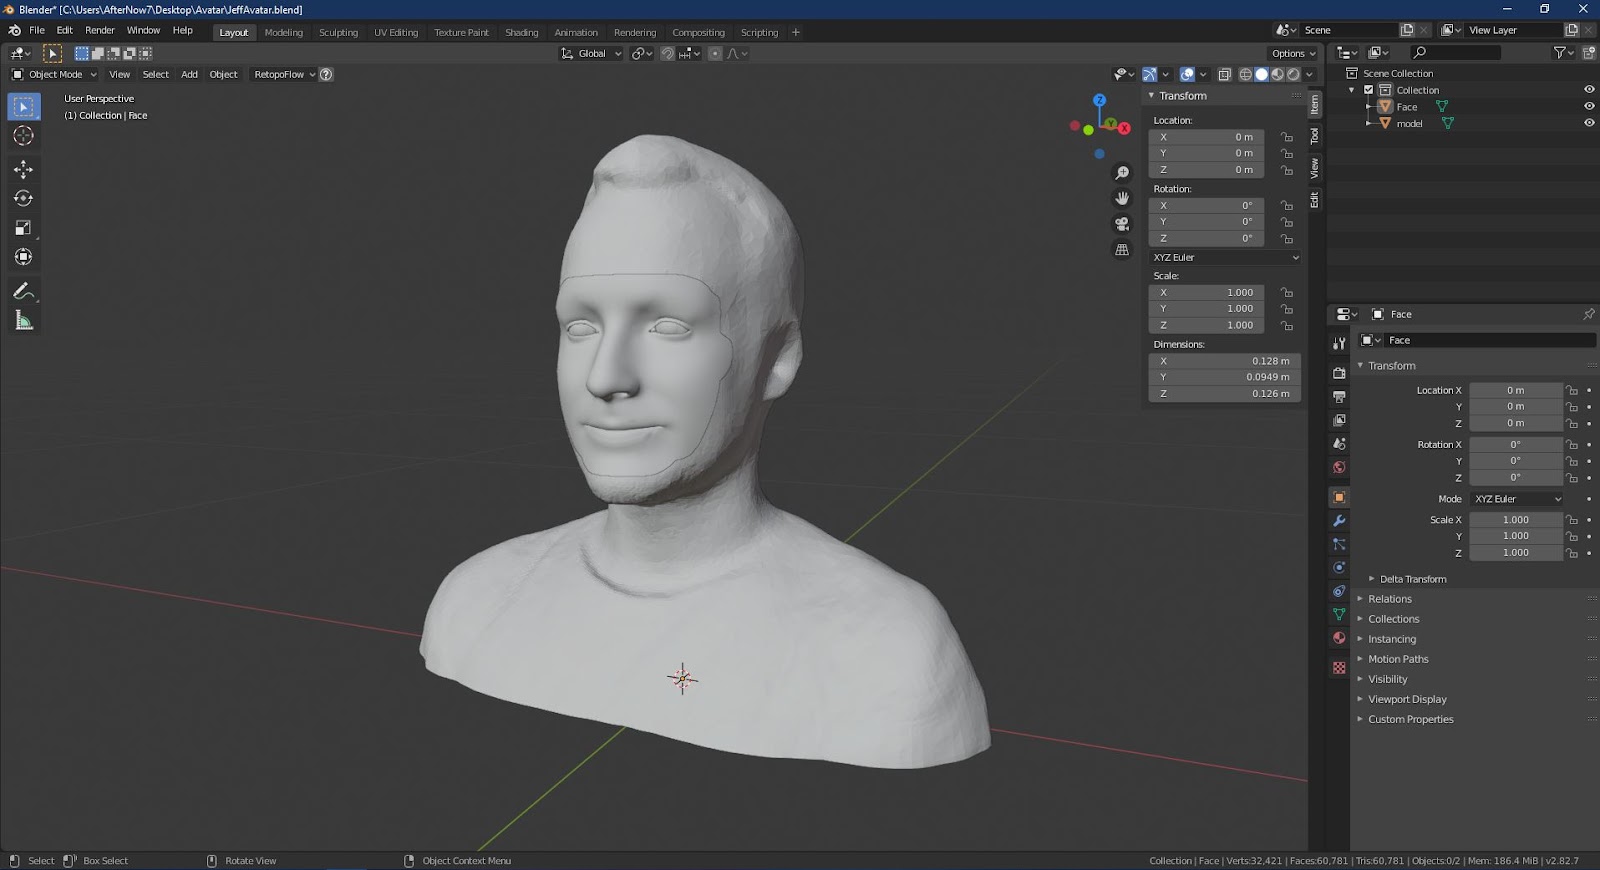
Hide “model” and select “Face” and in Edit Mode select all the faces on one side and also the border faces and delete. The other side of the face will be generated by using the “Mirror” modifier.

Select the centerline of the face and align it with the Z axis in the Front Orthographic view.

The triangles in “Face” can be converted to quads by removing edges in between. A very efficient way is to select multiple faces in a strip with the help of the “Circle Select” tool under the “Select” menu, deleting them and filling the holes with the “Bridge Edge Loops” tool under the “Edge” menu.


Once remeshing is done change the viewport shading to Wireframe and under the “Select” menu under “Select All by Trait” click “Faces by Sides” and make “Number of Vertices” 3. This will select any triangles left in the mesh. Make them into quads.

Once remeshing is complete, in Object Mode add and apply the “Mirror” modifier. Then in Edit Mode select all the faces and unwarp. In the UV Editor under the “UV” menu click on “Export UV Layout” and make “Fill Opacity” 1 and save as “Face.png”. In Object Mode apply a new material and name it “Face”. Then in the Shader Editor drag “Face.png” and plug it in the Base Color of Principled BSDF Shader.

Select “Face” in Object Model and move it slightly forward holding “Shift” in the Y axis so that “Face” is clearly seen with the wireframe texture. This will be very helpful for generating the rest of the mesh using the RetopoFlow tool.

Step 3 - Remeshing the Body
Click on “RetopoFlow” tool on the top left of the 3D Viewport and then click on “RF: Create new target”. A new object “RetopoFlow” will be created which can be seen in the Outliner. Select “PolyPen” from the option in the left of the viewport. Now you can press “Ctrl” and start cleft clicking to create the rest of the mesh. All the new vertices created will be snapped to the surface of the “model”. Here also only one half of the mesh needs to be created as symmetry on the X axis is on by default. Any change to the other half of the mesh can be made later on.


Once the remeshing of the body is done, hide “model”. Select “RetopoFlow” and rename it to “Avatar” and also rename the Mesh Data to “Avatar”. Delete the “Displace” modifier and apply the “Mirror” modifier and apply “Shade Smooth”.

Fill the base and give it a bevel to remove the sharp edge which can cause shading issues.


Select “Face” and in Object Mode delete the material and join “Face” into “Avatar”

Unhide “model”, select “Avatar” and in Sculpting Mode, using the “Inflate” brush adjust part of the hair to match with “model”. Make sure to turn off the symmetry on X axis which is on by default.

Step 4 - Texture Baking
The first step is to align “model” with “Avatar”, especially in the shoulder area. Select “model” and in Edit Mode select the vertices in the shoulder area that need to be aligned and assign it to “Group” vertex group.

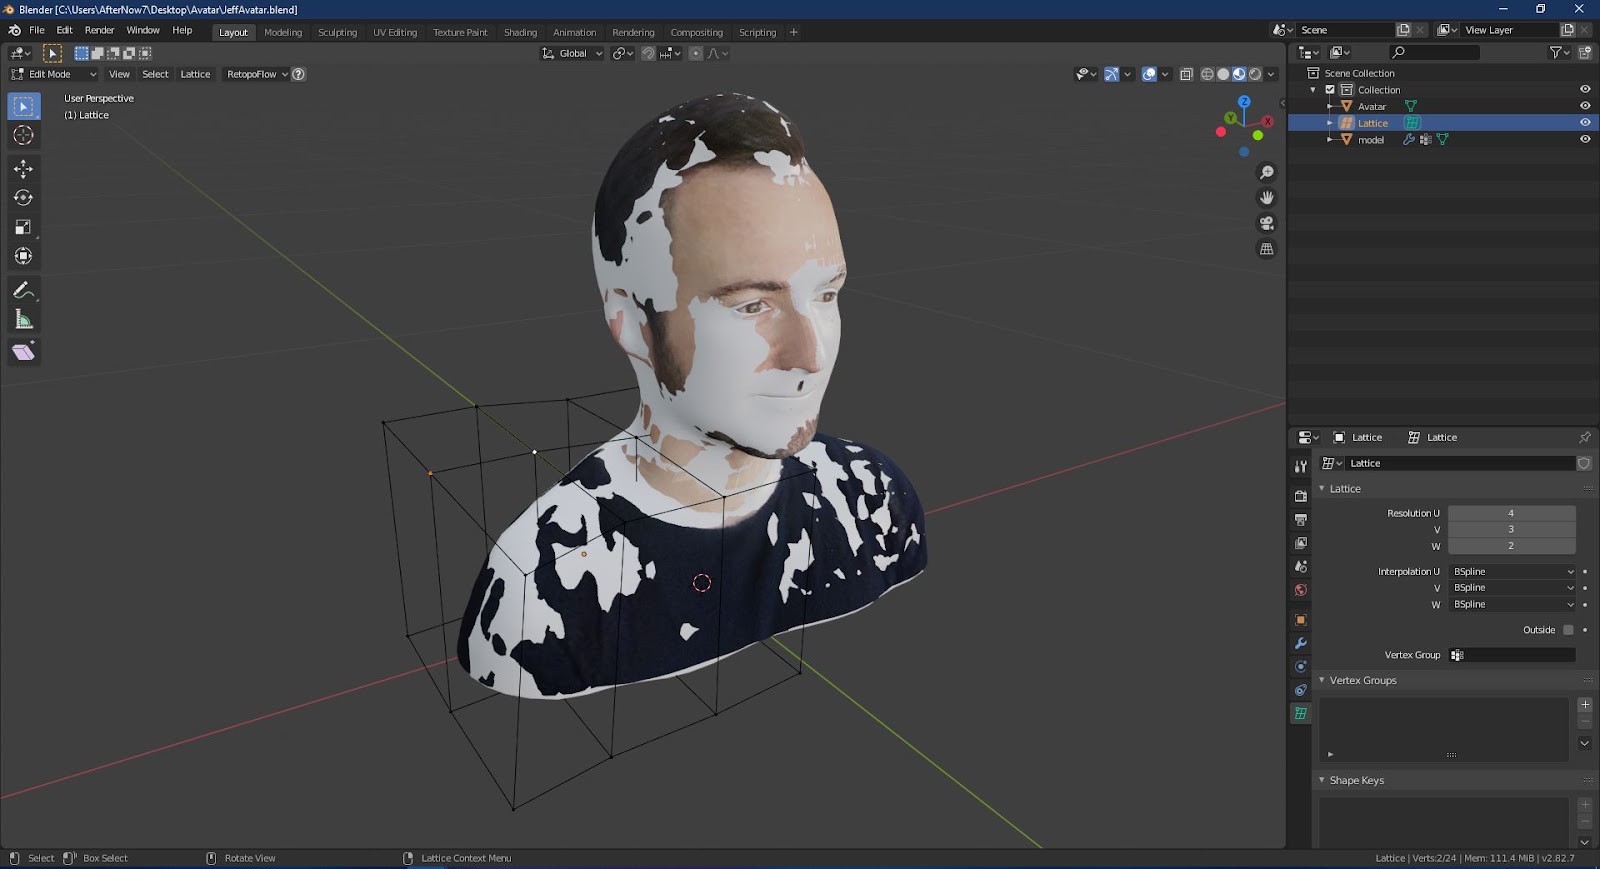
Create a lattice and scale it and place it to fit over the shoulder area. Increase the Resolution of U and V to 4 and 3 respectively inside the Object Data Properties.

Select ”model” and add the “Lattice” modifier. Under Object select “Lattice” and under Vertex Group select “Group”.

Select “Lattice” and in Edit Mode move the vertices so that the mesh of “model” aligns with “Avatar”. Then select “model” and apply the “Lattice” modifier and delete the “Group” vertex group. Then select “Lattice” and delete.
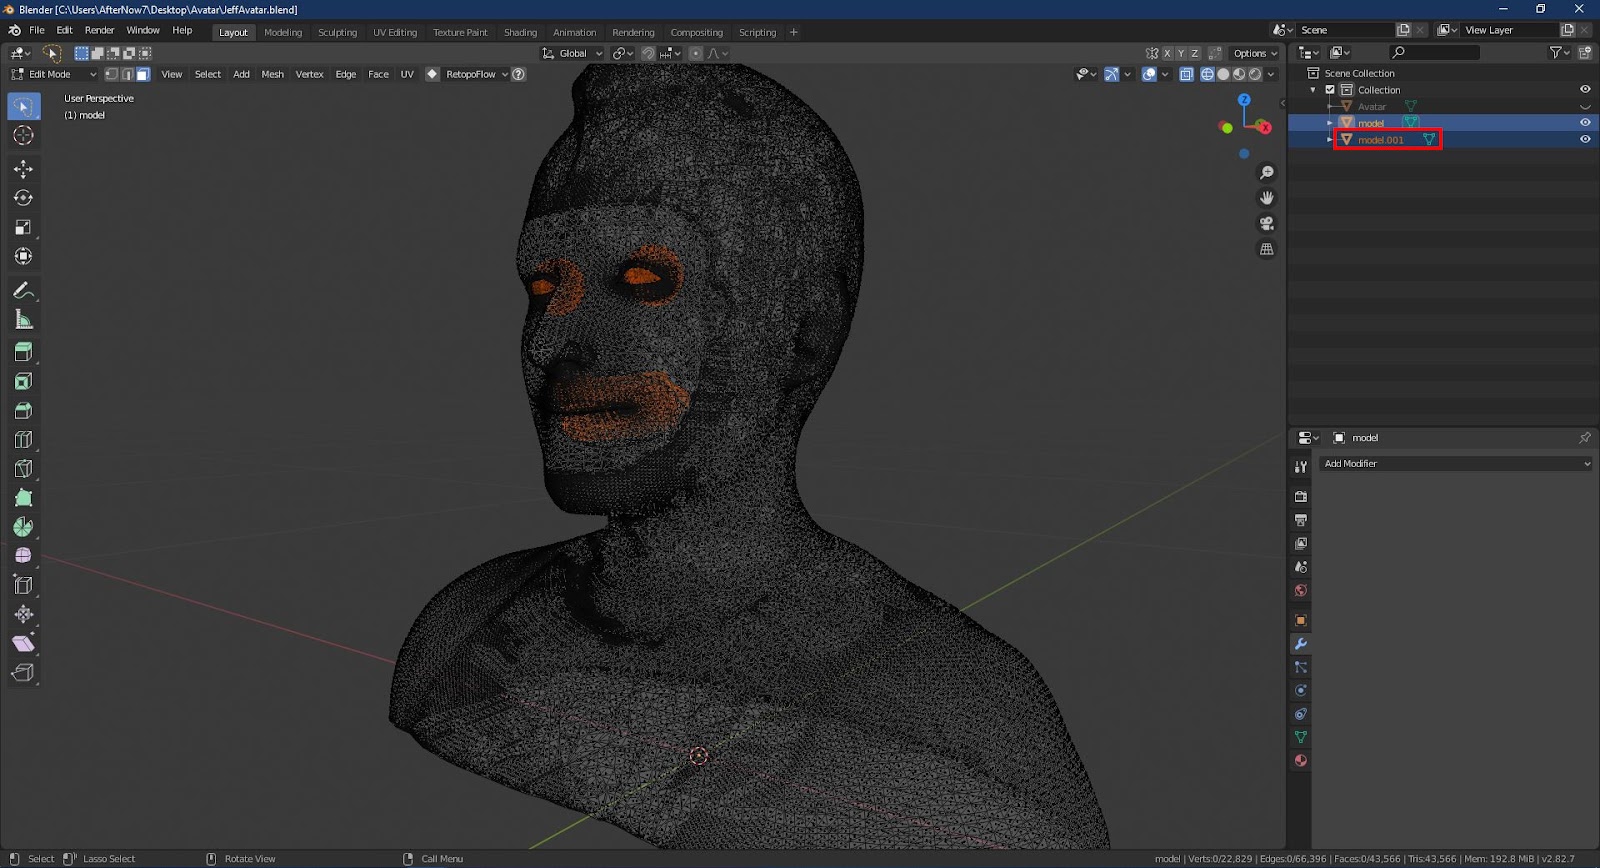
Hide “Avatar” and select “model” and in Edit Mode in Face select mode select the faces of the face, the body and the base by hovering the mouse pointer over the faces and pressing “L”.

Then invert the selection by clicking on “Invert” under the “Select” menu (Shortcut “Ctrl+I”). Change the viewport shading to Wireframe and ensure that the eyes, tongue and teeth are selected.

Then under the “Mesh” menu under “Separate” click on “Selection” (Shortcut “P”). The selection will be separated as a new object “model.001”.
Hide “model.001” and unhide “Avatar”. Select “model” and add the “Shrinkwrap” modifier and under Target select “Avatar” and apply.

Select “Avatar” and in Edit Mode in Edge select mode apply seams to separate parts like head, inside of mouth, nostrils, inside of eyes, front of chest, back of chest and base and click on “Unwrap” under the “UV” menu (Shortcut “U”). Open the UV Editor and place the UVs giving maximum space to the head UV and leaving some space for the eyes, tongue and teeth.
Note: A default “UVMap” will be created which can be seen under UV Maps section under Mesh Data Properties.

In the UV Editor create a new image 1024px x 1024 px and name it appropriately (“JeffAvatar” in this case).

Click on the drop down menu of Viewport Overlays in the top right corner of the 3D Viewport and check the “Face Orientation” and orbit around the model to check all the normals are facing outside (it should appear blue). If not then in Edit Mode select all the faces and under the “Mesh” menu under “Normals” click “Recalculate Outside”. Then uncheck “Face Orientation”. It is a good practice to check the orientation of the normals of the faces and ensure proper orientation to avoid any issue in the texture baking process and also avoid any shading issue.

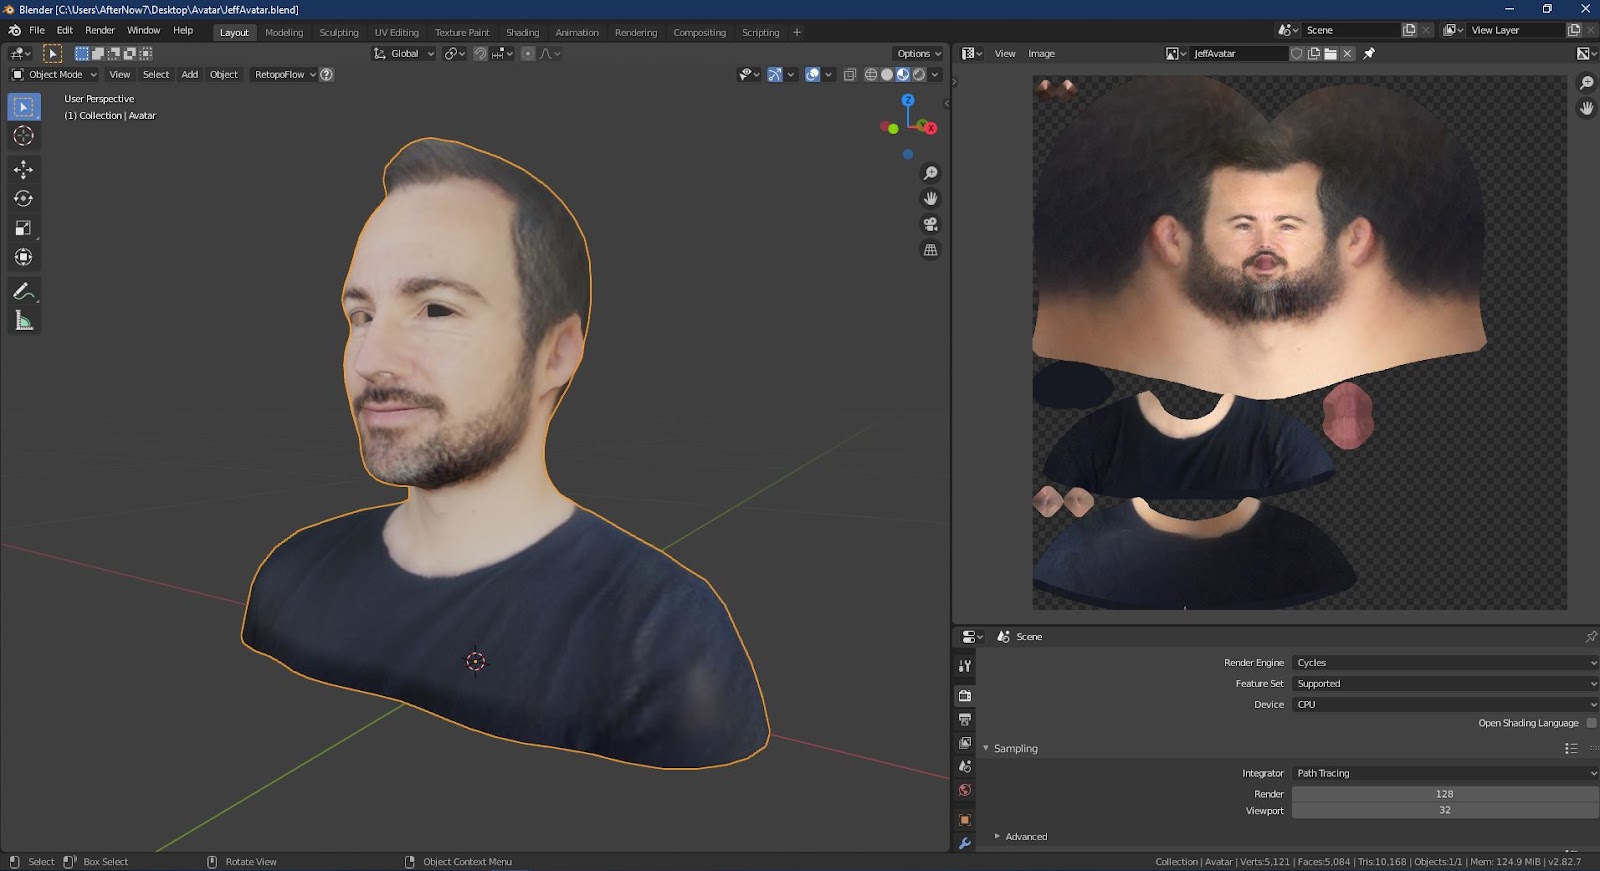
In Object Mode apply a new material to “Avatar” and name it appropriately (“JeffAvatar” in this case). Reduce Specular to 0.1. Open the Shader Editor, under the “Add” menu under “Texture” add “Image Texture” node (Shortcut “Shift+A”) and plug the Color into Base Color of “Principled BSDF”. Select the image created in the UV Editor (“JeffAvatar” in this case) in the drop down menu of the “Image Texture” node.

Open the Outliner and unhide “model” and select so that “Avatar” is active and “model” is selected. In the Render Properties change Render Engine to “Cycles” and under “Bake” section change Bake Type to “Diffuse”, under Influence select ”Color”, check “Selected to Active and Ray Distance 0.01 m and then click on “Bake”.

After the texture baking is done delete “model”. Open the UV Editor and save the baked image as png with an appropriate name (“JeffAvatar.png” in this case)
Step 5 - Remeshing, unwrapping and texture baking of teeth
Hide “Avatar” and unhide “model.001”. Select “model.001” and in Edit Mode select the faces of the upper teeth set and separate (default name “model.002”). Then select the lower teeth set and separate (default name “model.003”). Select “model.002” and “model.003” and in the Front Orthographic view move it in the X axis to align them in the center if they are offset from the center. Then model a low poly mesh around the upper teeth set and name it “teethupper” and one around the lower teeth set and name it “teethlower” and apply “Shade Smooth”. Turn on “Face Orientation” and ensure the normals are facing outside. Then turn off “Face Orientation”.

Select “teethupper” and “teethlower” and in Edit Mode select all the faces an unwrap both. Open the UV Editor and load the baked texture (for reference) and place the UVs in an empty area of the UV space.

Apply the Avatar’s material to “teethupper” and “teethlower” and bake the textures individually with the same bake settings and save the baked textures as “teethupper.png” and “teethlower.png”. Then delete “model.002” and “model.003”.

Step 6 - Remeshing and unwrapping of eyes.
Hide “teethupper” and “teethlower” and unhide “model.001”. Select “model.001” and delete the material (material_0) and in Edit Mode select the faces of one of the eyes and delete. Then select the faces of the other eye and separate and name it “eyes”. Remesh it into a low poly eye and select all the faces and unwrap. Open the UV Editor and load the baked texture of “Avatar” (for reference) and scale and place the UV in an empty area.
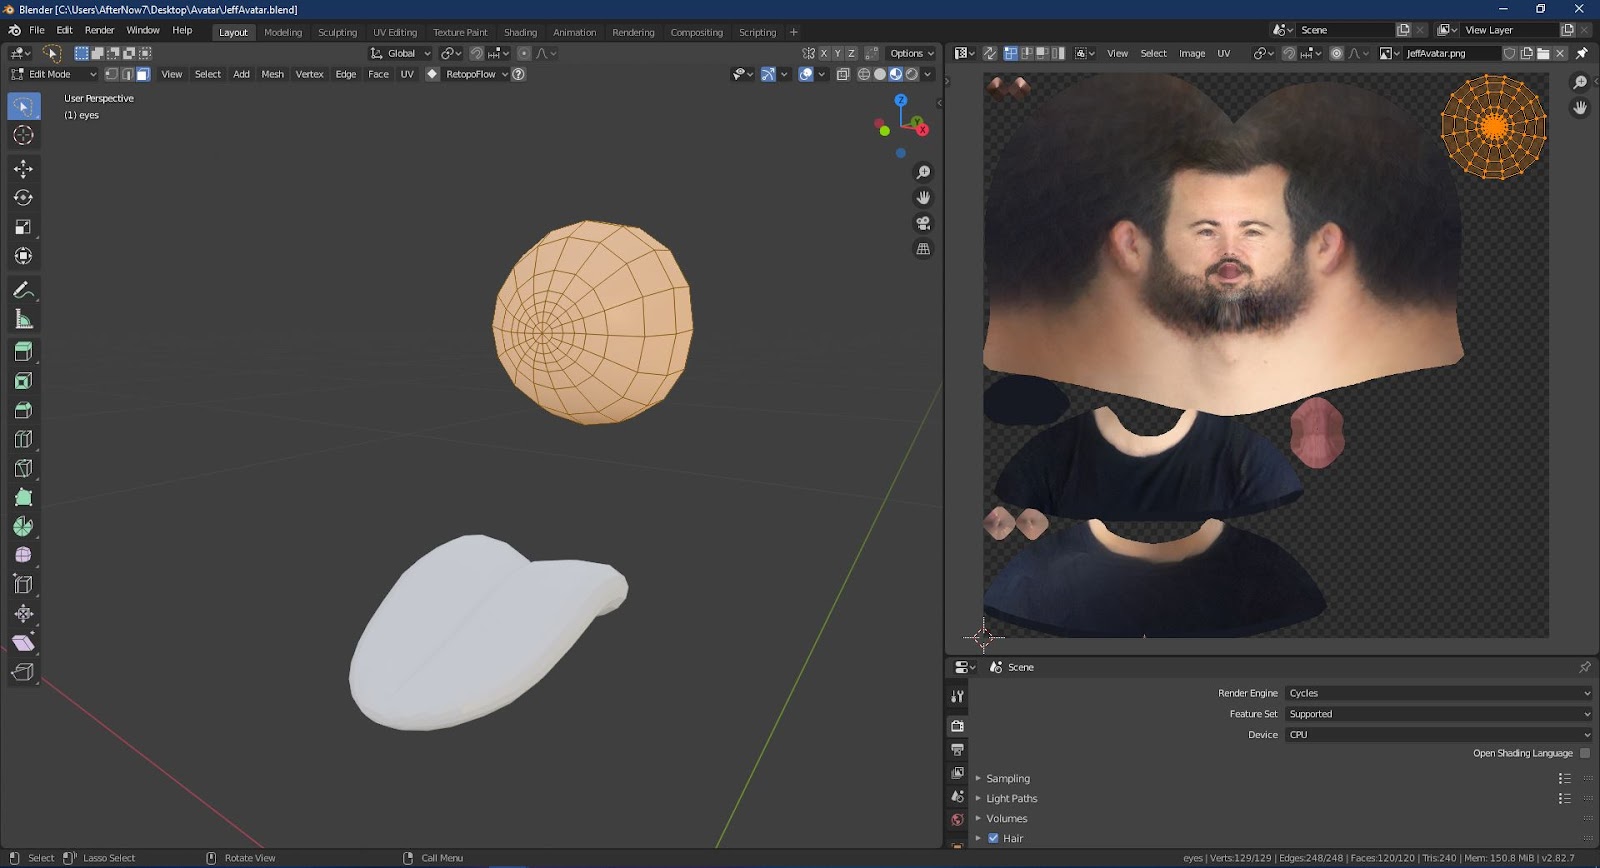
In Object Mode apply “Shade Smooth” and add the “Mirror” modifier and apply. Turn on “Face Orientation” and ensure the normals are facing outside. Then turn off “Face Orientation”.

Step 7 - Remeshing and unwrapping of tongue.
Hide “eyes” and select “model.001”. In Edit Mode select all the faces and in the Front Orthographic view move in the X axis.so that the tongue in center aligned. Then with the Edge select mode select the edges of the center of the tongue and align it.

Remesh the tongue and in Object Mode apply “Shade Smooth” add the “Mirror” modifier and apply. Turn on “Face Orientation” and ensure the normals are facing outside. Then turn off “Face Orientation”. In Edit Mode select all the faces and unwrap. Open the UV Editor and load the baked texture of “Avatar” (for reference) and scale and place the UV in an empty area.

Step 8 - Join all optimized meshes into “Avatar”
In the Outliner select “teethupper”, “teethlower”, “model.001”, “eyes” and “Avatar” last by pressing “Ctrl” key so that “Avatar” is active and then join all the objects into “Avatar”.
Step 9 - Creating texture file for “Avatar”
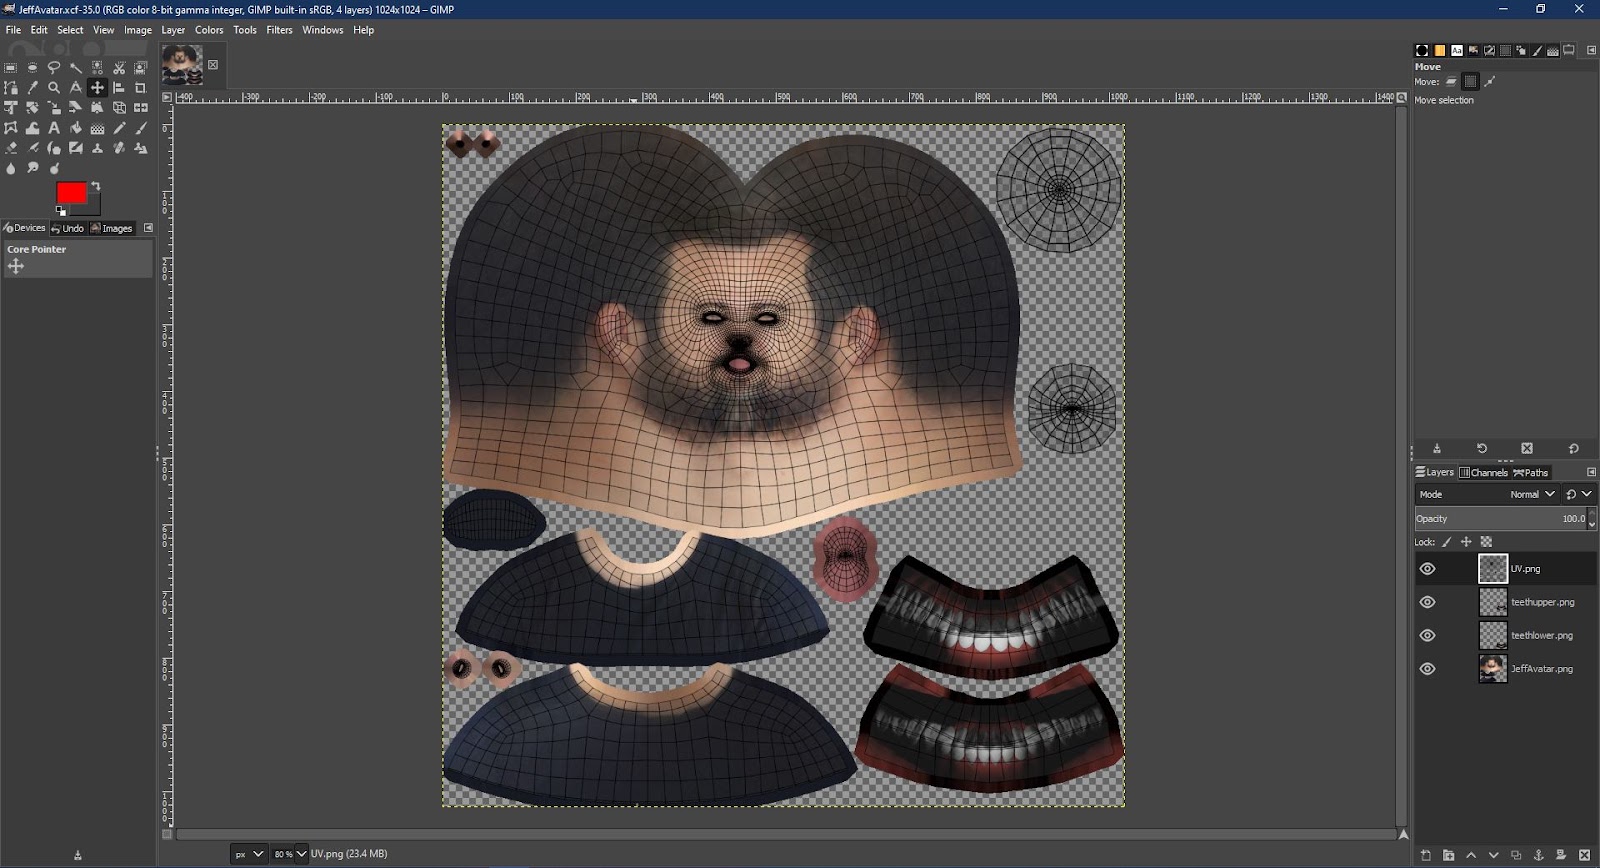
Select “Avatar” and in Edit Mode select all the faces and open the UV Editor. In the UV Editor under the “UV” menu click on “Export UV Layout” and save it as UV.png.

Open GIMP, under the “File” menu click “Open as Layers” (Shortcut “Ctrl+Alt+O”). Select “UV.png” and all the baked texture images and open. Make sure the “UV.png” layer is at the top and save the GIMP file with an appropriate name (“JeffAvatar.xcf” in this case).
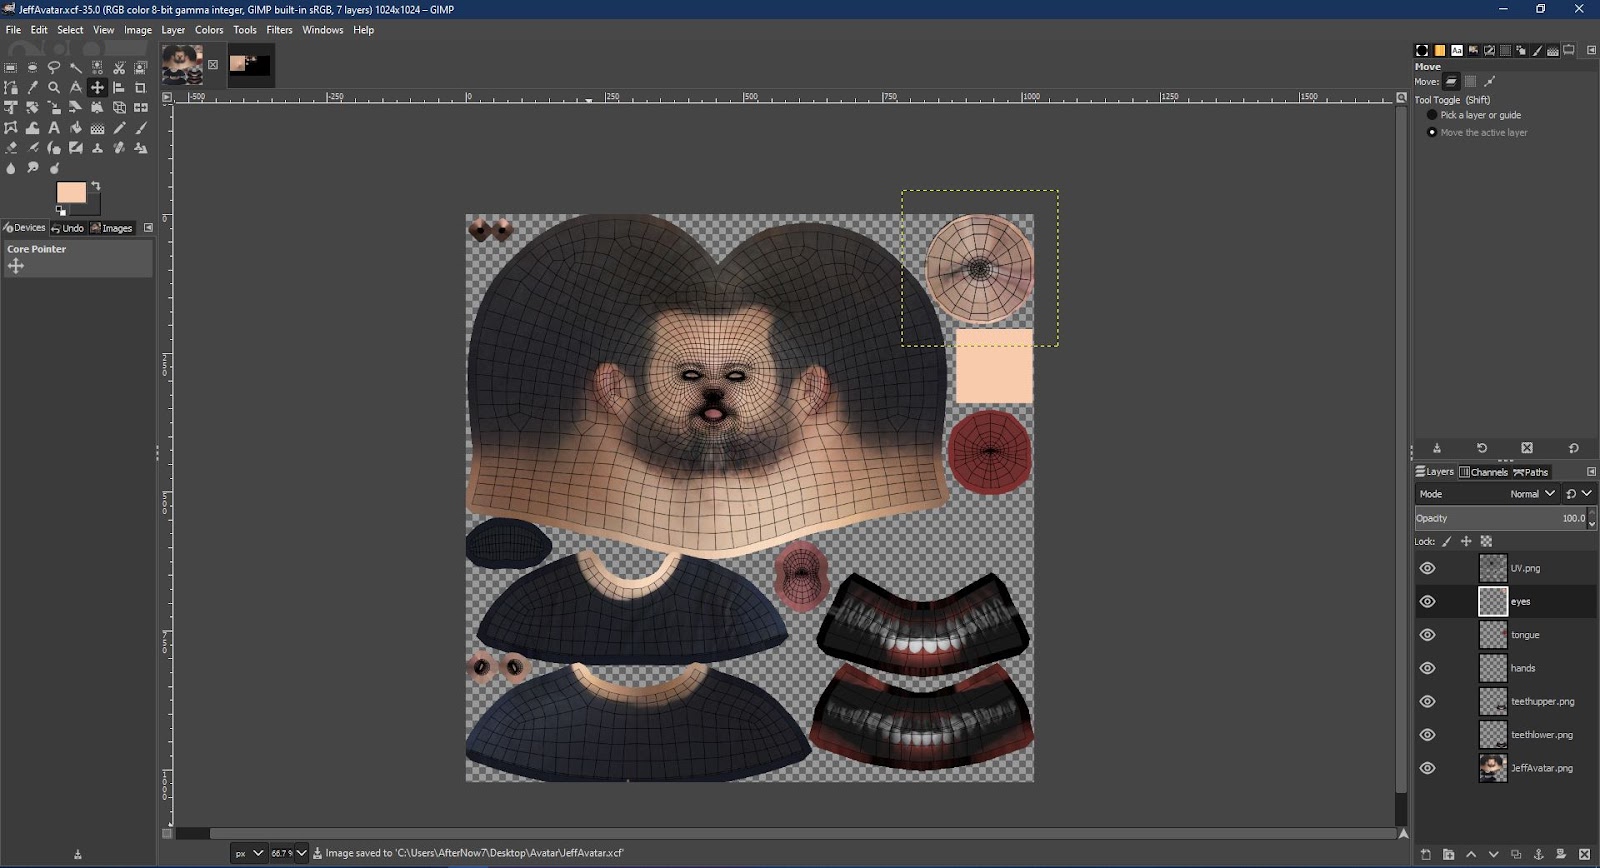
Create a transparent layer under the “UV.png” layer and name it “hands”. Using the Rectangle Select Tool and make a rectangle in an empty area. Then using the Color Picker Tool and pick color from the face and fill the rectangle with this color. Create another transparent layer under “UV.png” layer and name it “tongue” and fill with a dark red color.

Open the model.png (generated by “Avatar SDK Demo”) in GIMP and using the “Ellipse Select Tool” select the eye and paste it in the Avatar GIMP file and name it eyes. Scale it and place it under the eye’s UV. Then hide “UV.png” layer and export image as JPG with appropriate name (“JeffAvatar.JPG” in this case)

In Blender open the Shader Editor and delete the texture node attached to Avatar’s material. Then drag this new saved jpg image (“JeffAvatar.JPG” in this case) and plug it in the Base Color of the Principled BSDF Shader.

There is a good chance of the eyes texture being offset.To fix that in Edit Mode select both the eyes and turn off “Show Overlays”. Open the UV Editor and load the saved jpg image (“JeffAvatar.JPG” in this case) and rotate and scale the UV’s of the eyes and fine tune it till the eyes look good in the 3D viewport. Then turn on “Show Overlays”.

Step 10 - Importing Hands and Armature and Rigging the Avatar
Download “AvatarBot_base_for_export.blend” from the link below.
https://github.com/MozillaReality/hubs-avatar-pipelines/blob/master/Blender/AvatarBot/AvatarBot_base_for_export.blend
Import “Avatar” and “AvatarRoot” into Blender from “AvatarBot_base_for_export.blend”.
Note: The “Avatar” imported will be renamed “Avatar.001” by default because of the existing “Avatar” in the file.

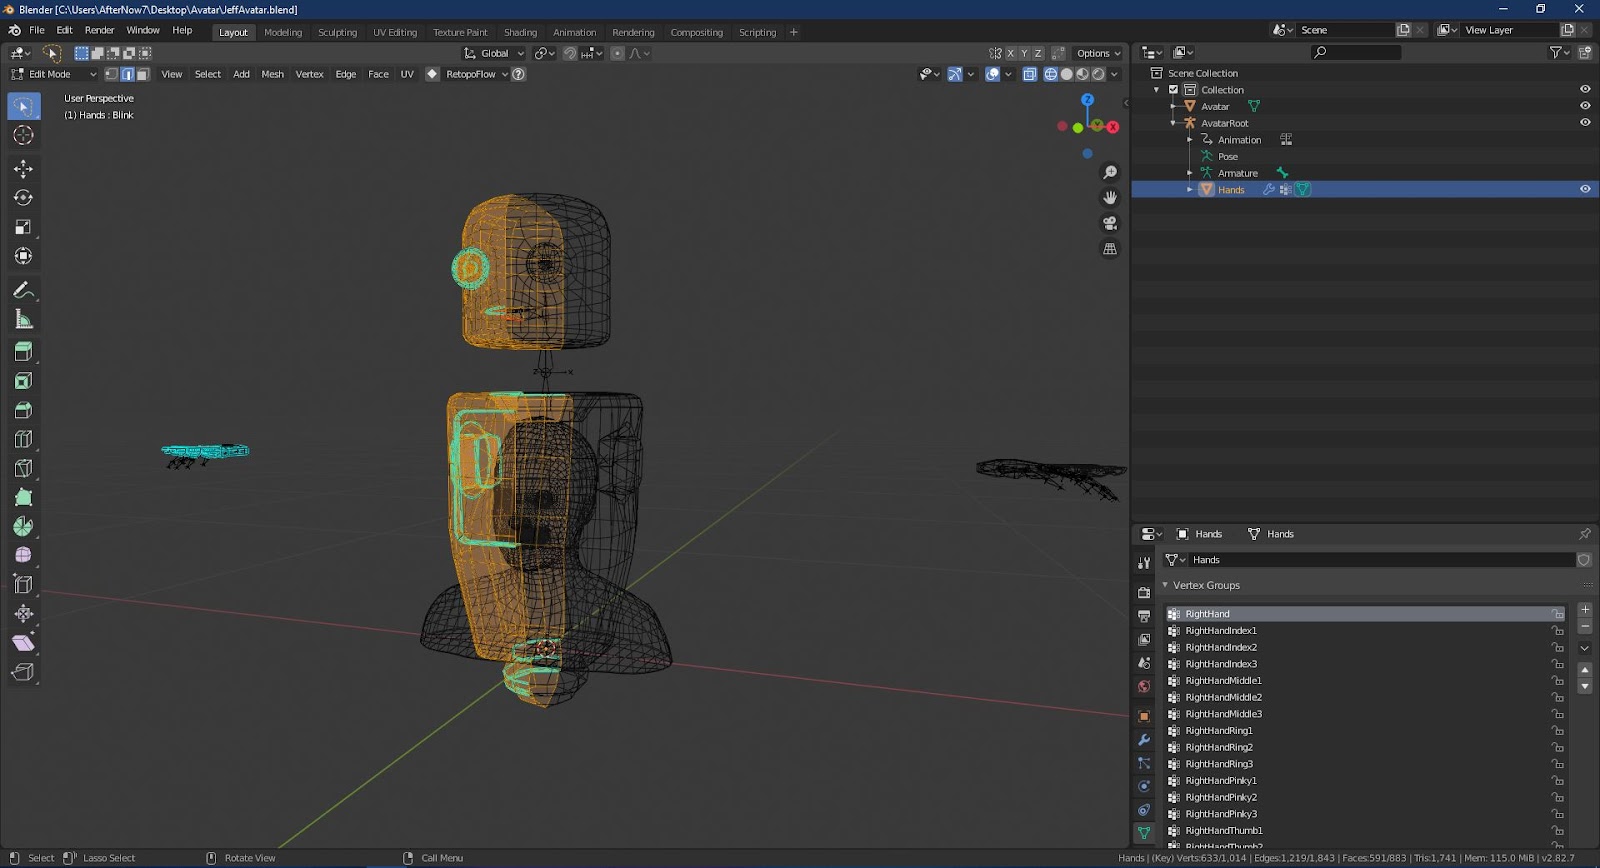
Select “Avatar.001” and rename it “Hands” and also rename the mesh data to “Hands” to stay organized. In the Properties Panel, under Object Data Properties, under Vertex Groups delete the vertex groups Hips, Spine, Neck, Head, LeftEye and RightEye

In Edit Mode select all faces of the head and body of “Hands” (excluding hands) and delete.
In Object Mode in the Properties panel under Object Data Properties under “Shape Keys” section delete the shape keys (“Bases” and “Blink”) and “UV Maps” section rename “map1” to “UVMap”.
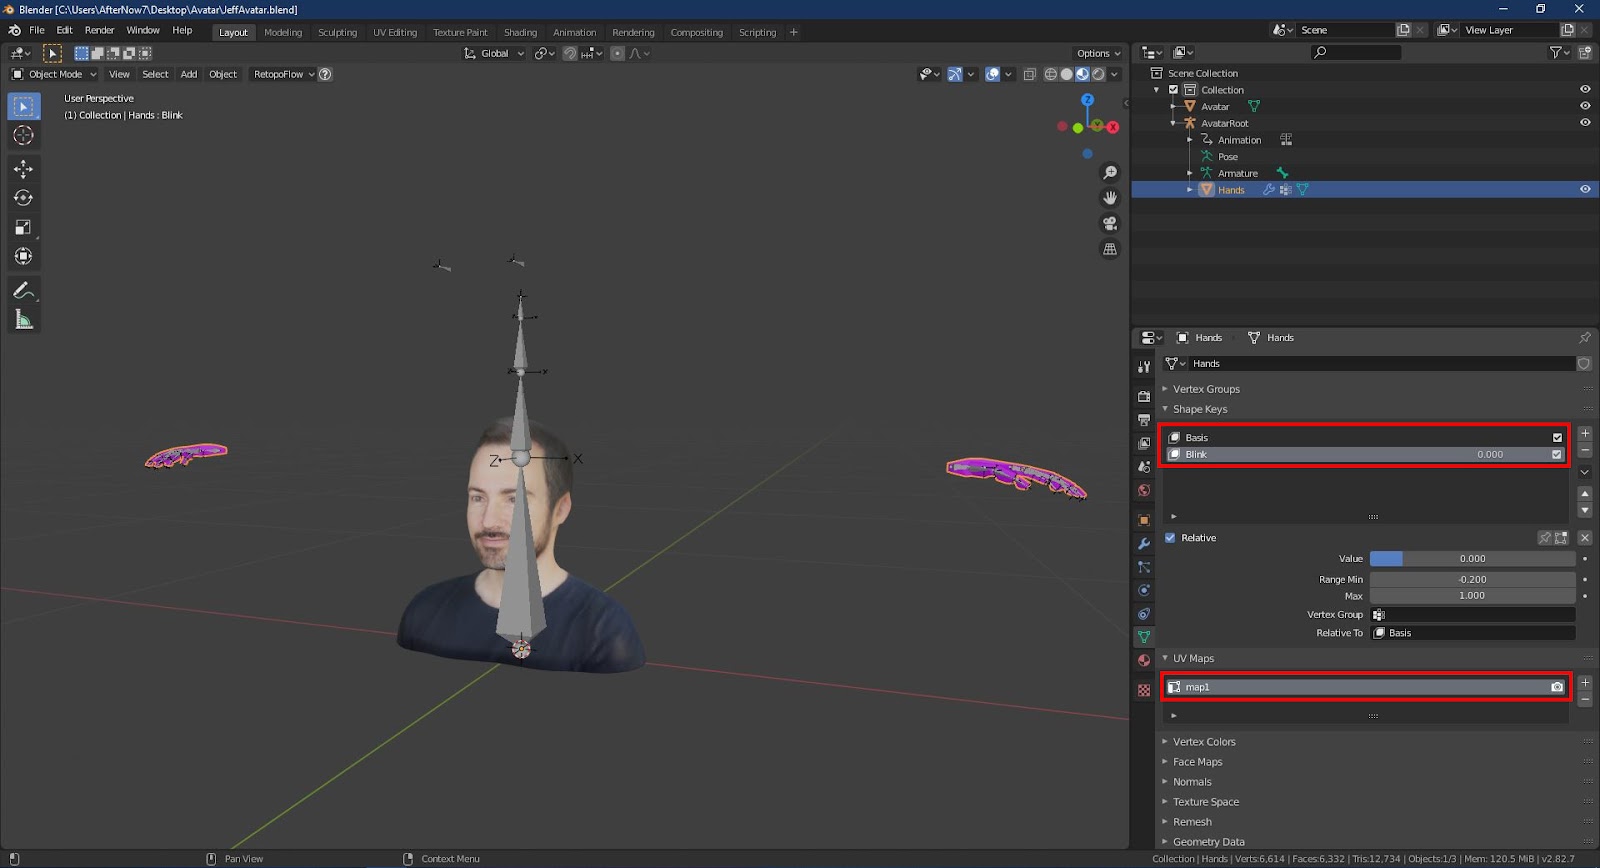
In The Properties panel under Material Properties change the existing “Bot_PBS” material to the Avatar material by clicking in the drop down menu (“JeffAvatar” in this case) and in the Modifiers Properties apply the “Mirror” modifier.

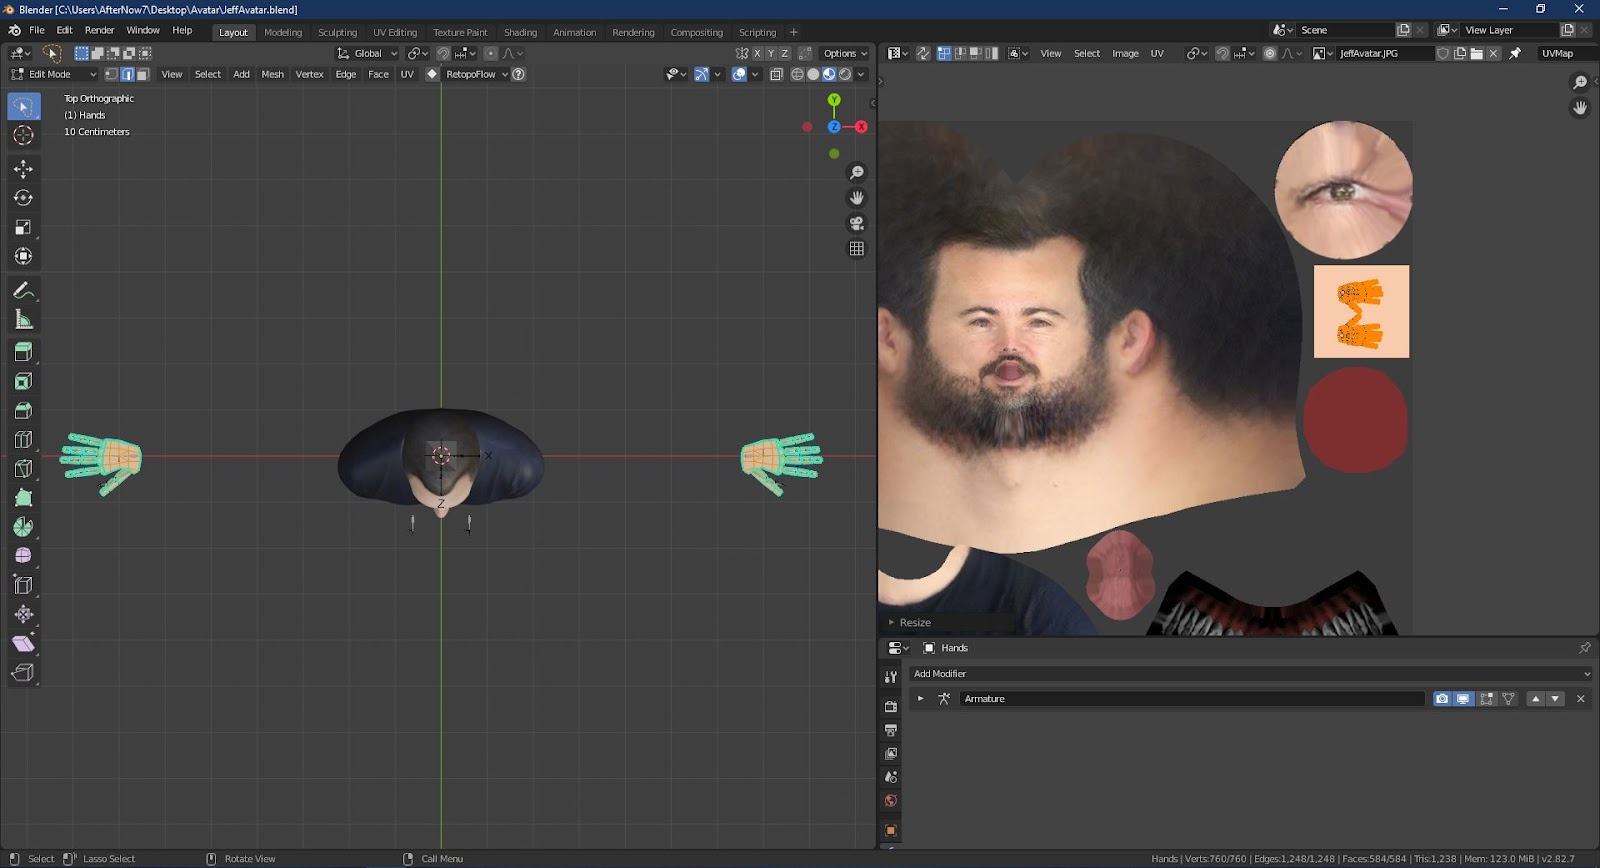
In Edit Mode select all faces of “Hands” and project the UV from Top Orthographic view using “Project From View” option under the “UV” menu. In the UV Editor load the Avatar jpg image (“JeffAvatar.JPG” in this case) and place the Hand’s UV in the skin color rectangle.
Select “Avatar” and in Edit Mode select all faces and move up in the Z axis in the Right Orthographic view so that the base of the mesh aligns with the base of the “Spine” bone and move in the Y axis so that the “Neck” bone is in the center of the neck of “Avatar”.

Select “AvatarRoot” and in the Right Orthographic view adjust the “Spine”, “Neck” and “Head” bones in Edit Mode by moving the start joint and end joint of the bones in the Y Axis.

Turn on the X-Axis Mirror option in the top right corner of the 3D Viewport and select the “RightEye” bone and place it in the center of the right eye in the Front Orthographic view.
Note: Since the X-Axis Mirror option is on the “LeftEye” bone will be mirrored in the X axis.
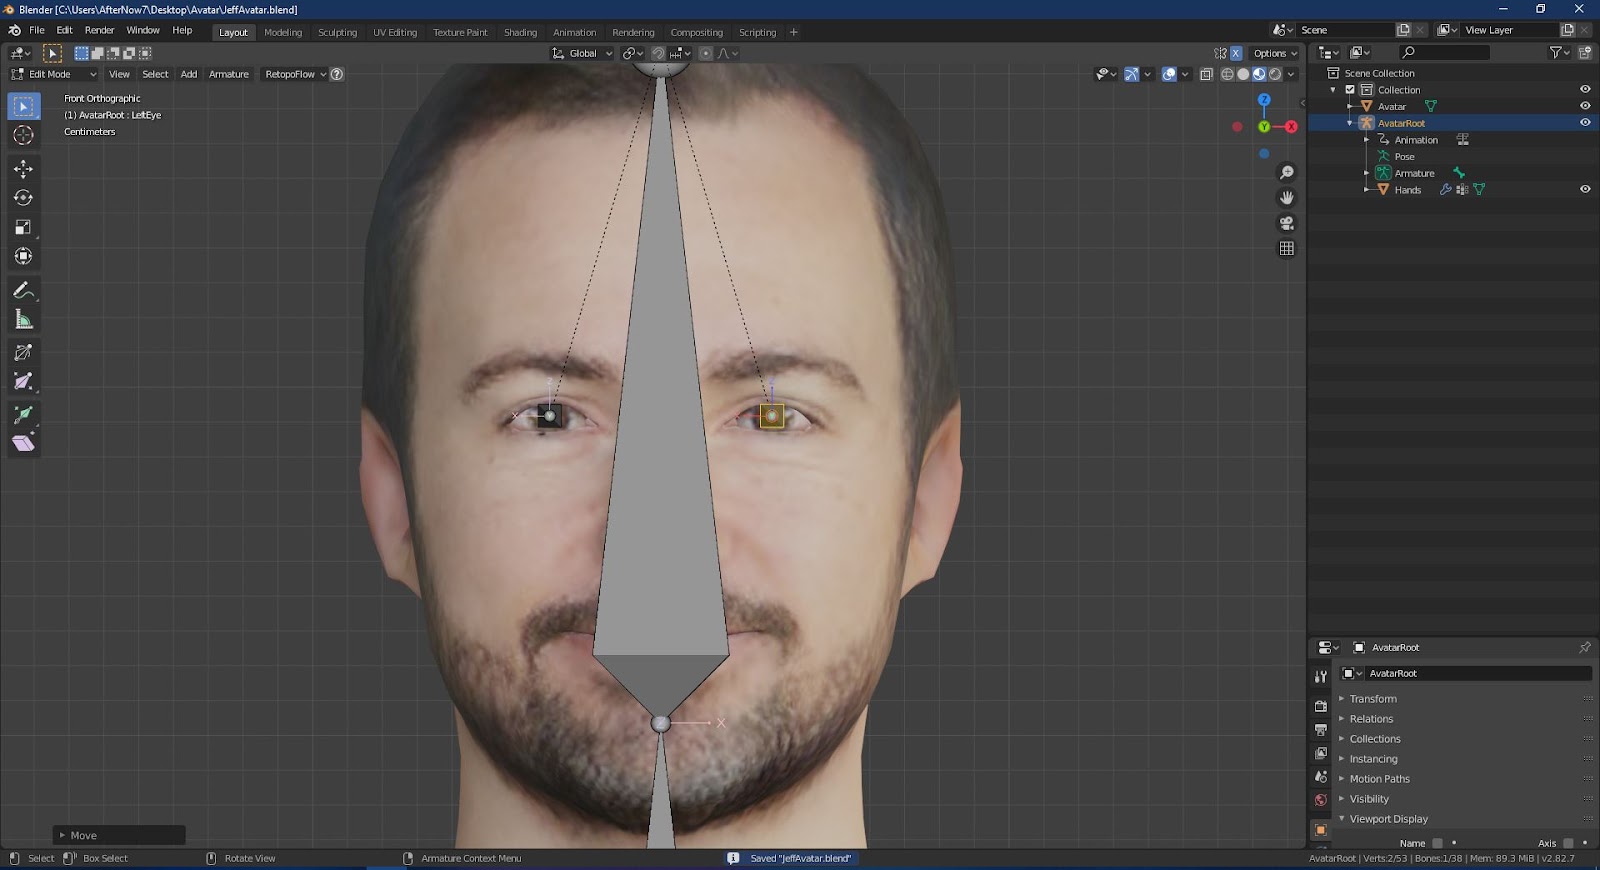
Then move the “RightEye” bone in the Y Axis in the Right Orthographic view. Also move the start joint and end joint of the “RightEye” bone so that bone is of proper size and just inside the eye.

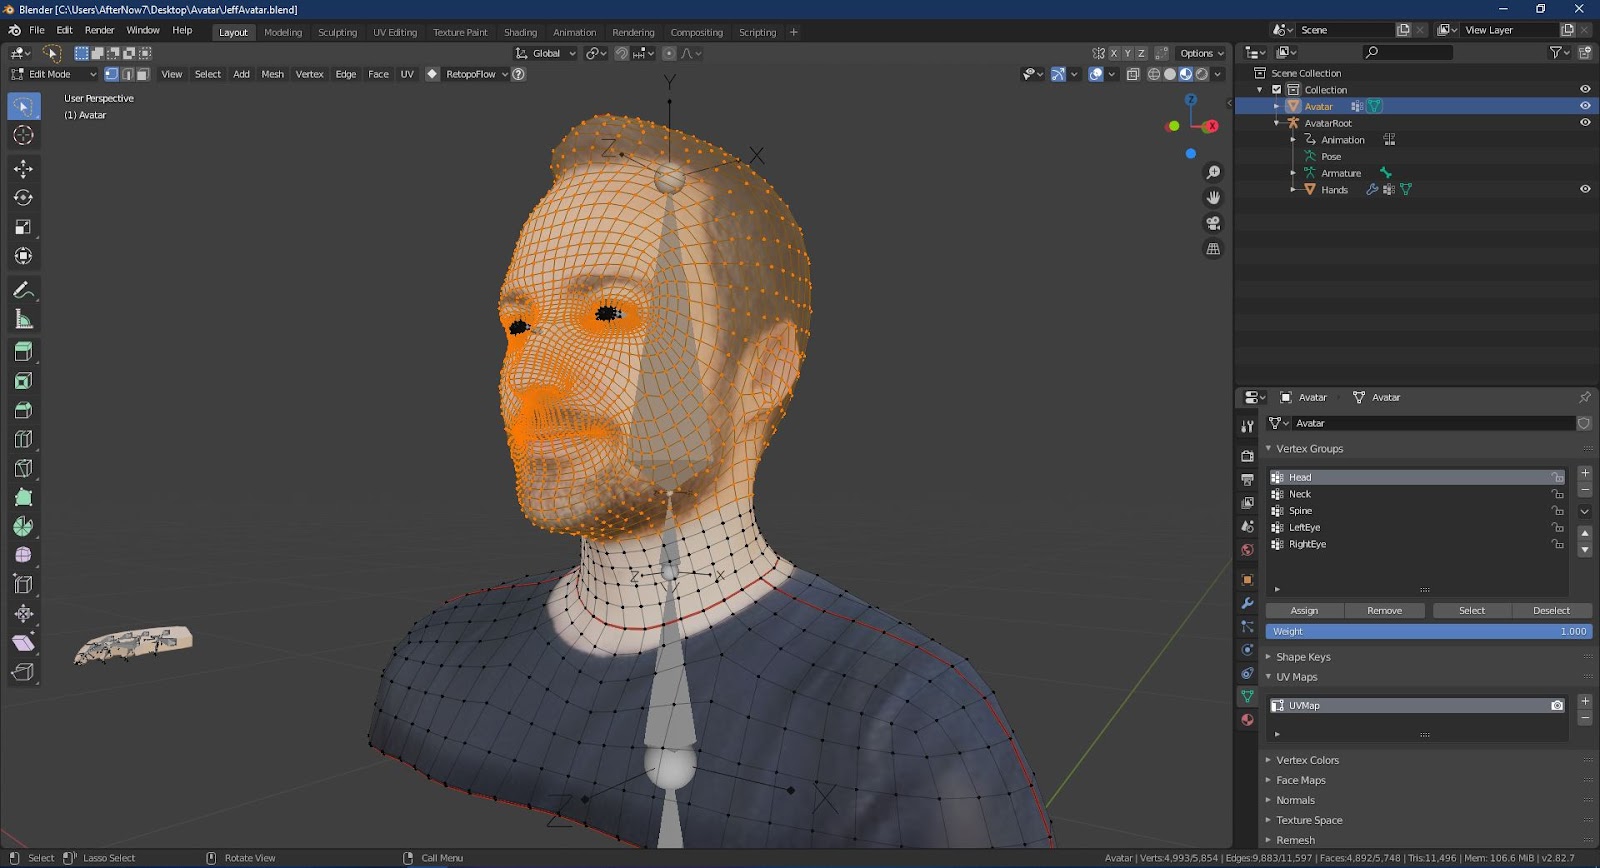
Select “Avatar” and in the Properties panel under the Object Data Properties under Vertex Groups create “Head”, “Neck”, “Spine” “RightEye” and “LeftEye” vertex groups. In Edit mode select the vertices of the chest and shoulders and assign to “Spine” vertex group keeping Weight 1.00

Select the vertices around the neck and assign to “Neck” vertex group keeping Weight 1.00.

Similarly select the vertices of the right eye and assign to “RightEye” vertex group and select the vertices of the left eye and assign to “LeftEye” vertex group keeping Weight 1.00

Select all the vertices of the “Neck”, “Spine”, “RightEye” and “LeftEye” vertex groups by clicking the “Select” button under Vertex Groups section and then in the 3D Viewport under the “Select” menu click “Invert” (Ctrl+I) and assign these vertices to “Head” vertex group keeping Weight 1.00.
In Object Mode select “Avatar” and then “AvatarRoot” in the 3D Viewport and under the “Object” menu click on “Parent” (Shortcut “Ctrl+P”) and click on “With Empty Groups”. Then in the Properties panel under Object Data Properties delete all vertex groups of hands.

Step 11 - Checking the Rig and Texture Stretching
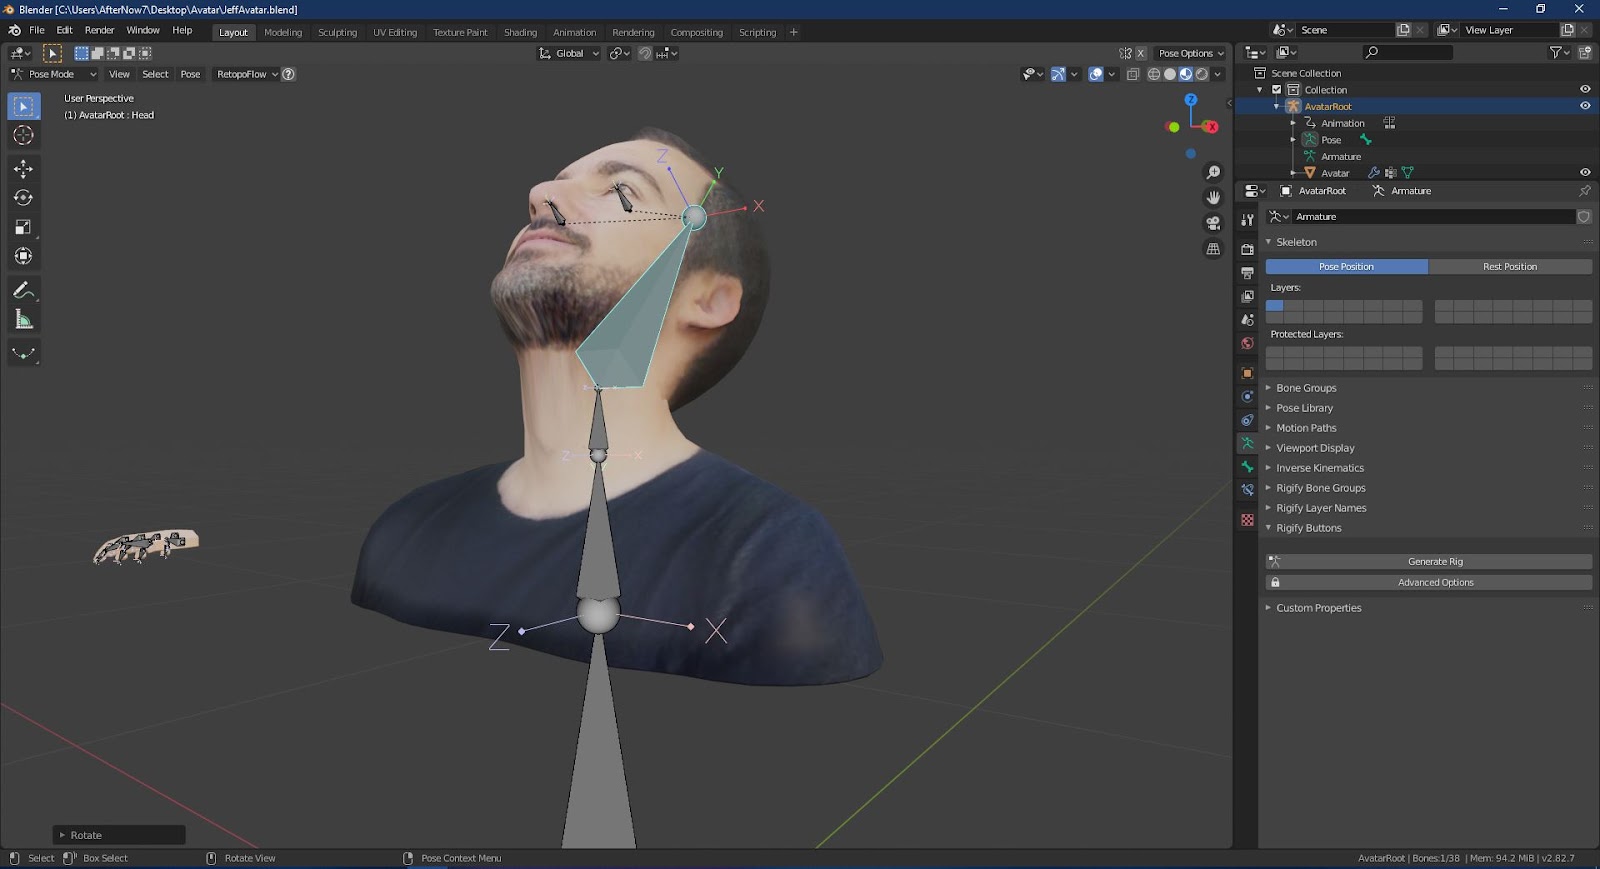
Select “ AvatarRoot” and in Pose Mode rotate the “Neck” and “Head” bones and check if there is any weird deformation of the mesh or if there is any evident texture stretching in the neck area. Fix any evident texture stretching by opening the texture file in GIMP and identifying the area where texture is getting stretched and painting over that area. Then save the texture and reload in blender and check if the texture stretching has been minimised or not.
Note: Texture will get stretched because of the nature of skinning required for the Avatar to function properly.
Here the idea is to reduce the visibility of the texture stretching.
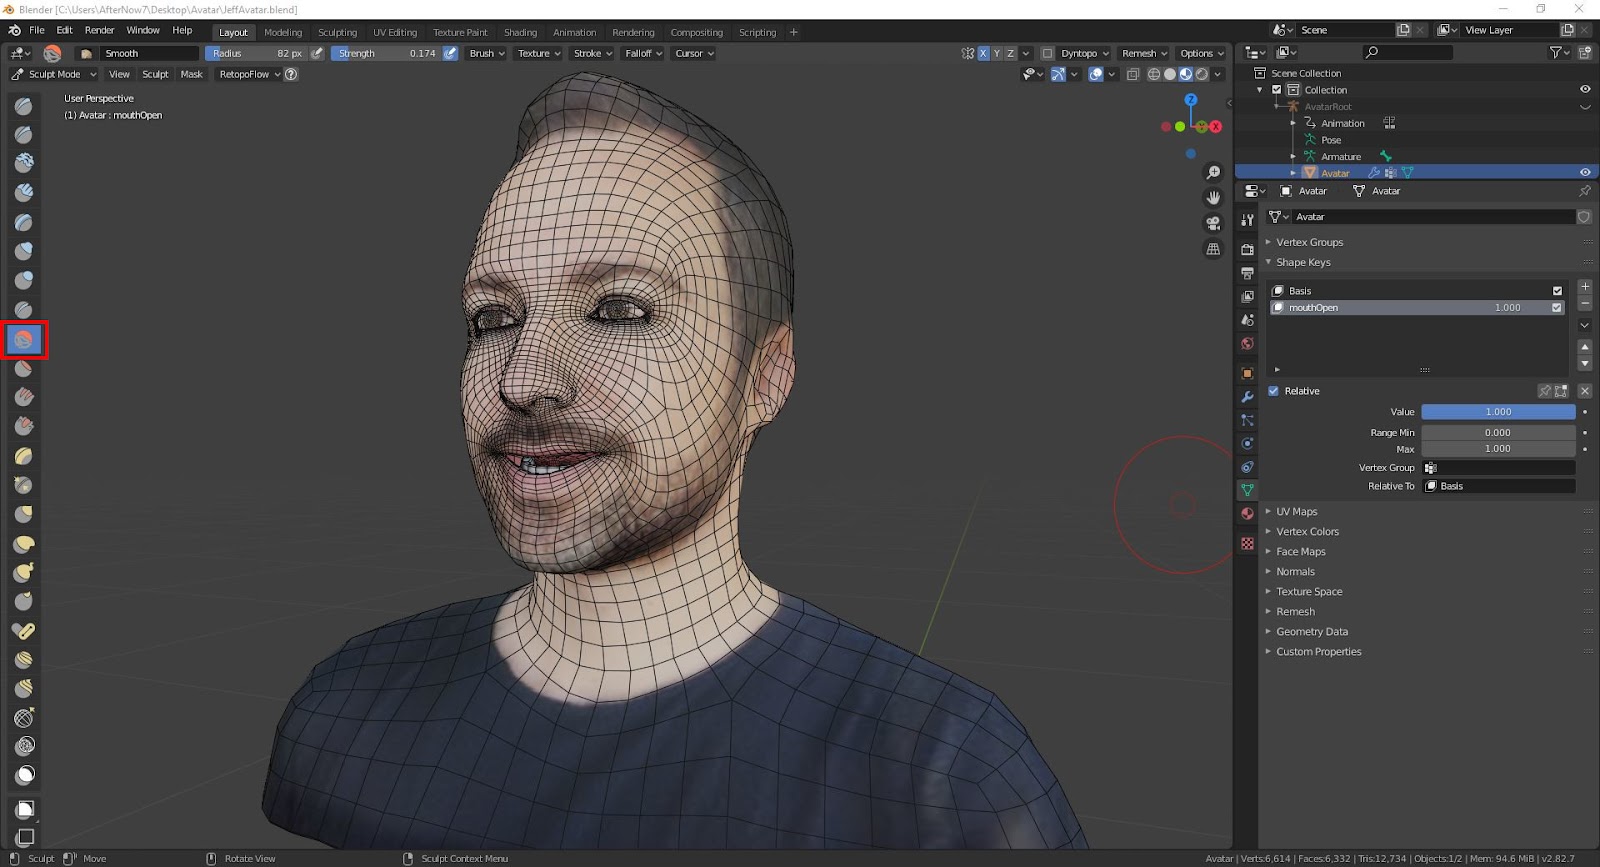
Step 12 - Creating Shape Keys for Mouth
Hide “AvatarRoot”, select “Avatar” and in the Properties panel under Object Data Properties under Shape Keys create “Basis” and “mouthOpen” shape keys. Select “mouthOpen” and make “Value” 1.0. In Edit Mode select the vertices of the lower lip and chin and move it down to open the mouth. Use the “X axis mirror editing” option in the top right corner of the 3D Viewport so that editing on one side is mirrored on the other side.
Also select the lower teeth set and move it down in the Z axis to match the opening of the lower lip.

Also in the Properties panel under Object Properties under Viewport Display check “Wireframe” and in Sculpt Mode use Smooth Brush to smooth out the vertices. Once editing is done select “mouthOpen” shape key and make “Value” 0.
Note: Turning on “Wireframe” before sculpting gives a better visibility of how the mesh is getting affected.
Step 13 - Exporting GLB
Unhide and select “AvatarRoot” and in the Nonlinear Animation panel check all the actions.
Note: Make sure that only the “Armature” modifier is there on “Avatar” and “Hands”. Other modifiers on the objects may adversely affect the functionality of the Avatar.

In the Timeline panel type 1 in the Current Frame box. Under the “File” menu under “Export” option select “glTF 2.0(.glb/.gltf)”. In the Blender File View window under Animation check “Use Current Frame” and export with appropriate name (“JeffAvatar” in this case)

Step 14 - Testing the Avatar
Open “https://gltf-viewer.donmccurdy.com/” in any web browser and drag or upload the Avatar glb file. Under Animation check all the actions by clicking in the checkbox individually. Under Morph Targets check the functionality of the “mouthOpen” shape key by dragging the slider.

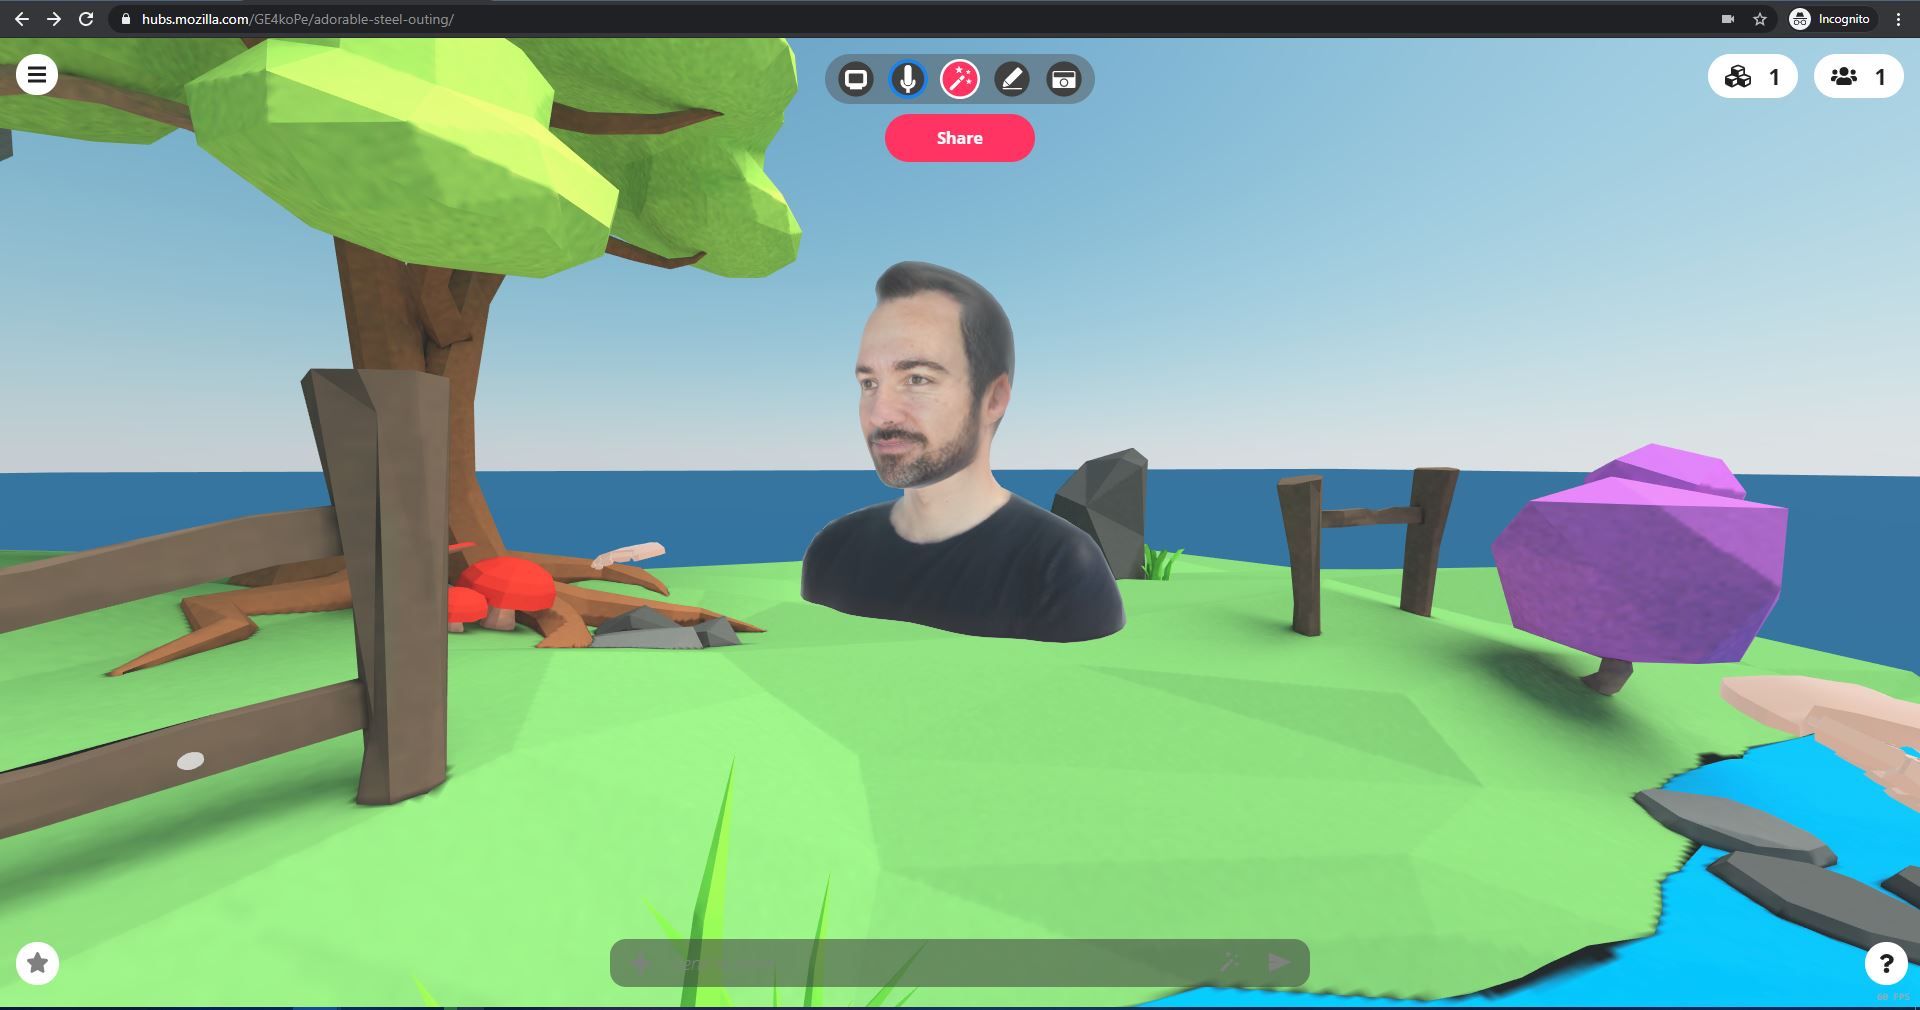
Finally load the Avatar in “Mozzila Hubs” and activate the Camera tool and move it around the Avatar.
