
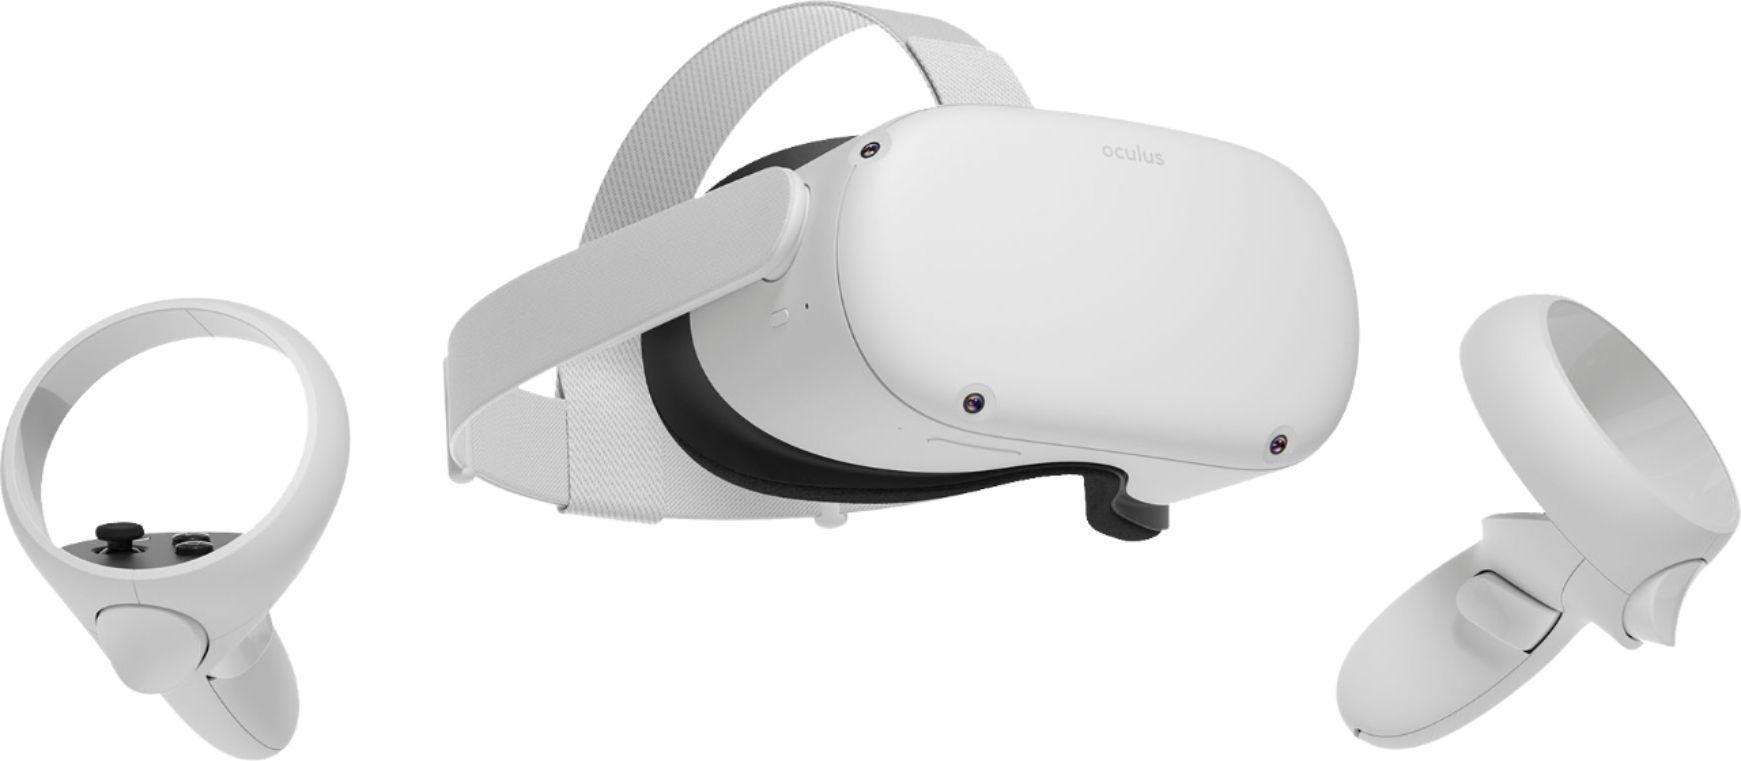
Intro
Someone sent you a presentation id and asked you to join their presentation. That's great. An AfterNow Prez presentation is something you don't want to miss, and we suggest experiencing it with a VR or AR headset.
Here is a step by step tutorial on getting AfterNow Prez installed and joined the presentation.
Installation
AfterNow Prez is not yet on the Oculus Store. It is on Oculus App Lab, to install it you will need to follow this link:
https://www.oculus.com/experiences/quest/3434684843326642/
Click on the "Get" blue button. If you are not login it will ask you to login with Facebook and authorize Oculus aka MetaQuest.
Once the button display in dark blue with "Purchased" it means the app as been added to your app library in your Quest.
Starting the app
Go in your Quest look for the 9 little squares button to open your app's library. On the top-right drop-down, select Not Installed, look for AfterNow Prez, and click click on it, it will install and start.
Join a presentation
Once the app open, you will see the Login Menu. To join someone else's presentation, you can either log into your User Account or uses Guest Access.
The quickest way to attend someone else's presentation is to join as a Guest. To do so:
- Select the
Guest Accesstab. - Enter the eight-digit Presentation ID.
- Click
Join as Guest.
Start and navigate the presentation
Click here if you are using your hands instead of the controllers:
https://youtu.be/BYYwqQ91QN4
Open the Spectator menu
If you have your controllers put them down to initiate hand-tracking.
You should now see your hands, look at the palm of your hand to reveal the hand menu button. Click on it with the index finger of your other hand.
If you want to use your controllers press the X or A button to popup and hide the menu.
Once summoned, the menu will pop up in front of you and look something like this:
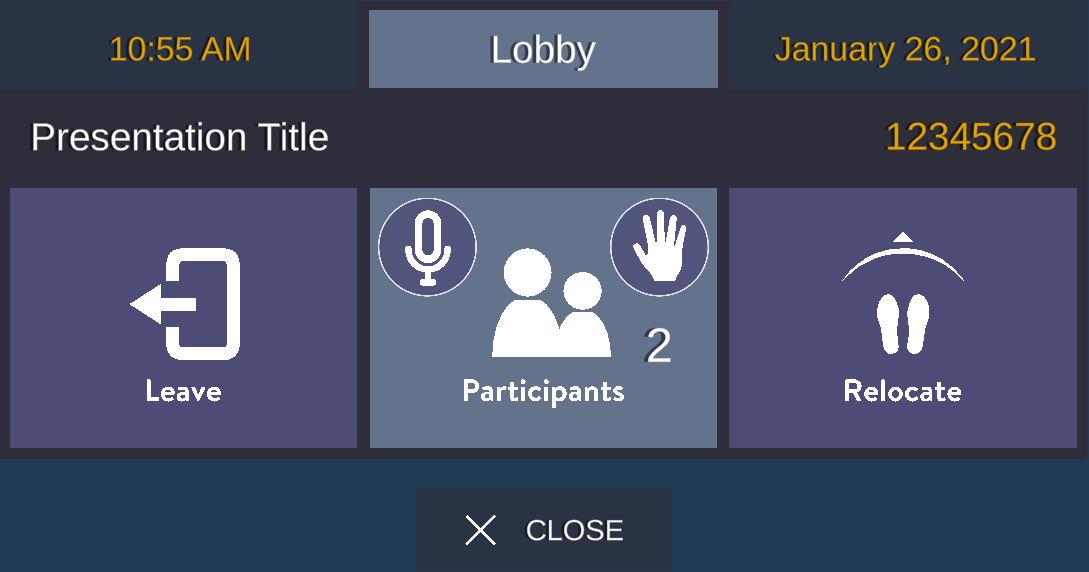
In this menu, you will find the following:
- Slide Number - "Lobby" is used here before the presentation has started.
- Presentation Title & ID - which you entered to access the session.
- Leave Button - to exit the presentation once the meeting is done.
- Participant Count & Mute Button - to disable your microphone, if desired.
- Raise Hand button - to get the attention of the speaker.
- Relocate Button - to adjust the presentation's placement, if desired.
- Close Button - to hide the menu again; you can also press
AorXagain.
To use any of the buttons in the menu, you can aim at it with either controller and use the trigger, or (with hand-tracking enabled) simply aim with your hand and perform an AirTap by pinching your index finger and thumb.
Changing your Location
The presentation's placement is determined by where you were standing/sitting when it initially loaded. Please take moment to look down and notice the location pad underneath you. Although you are free to move around, of course, we recommend using this positioning during the presentation for the best experience. In case the initial location does not work well for you, please select a new location and heading (i.e., the direction in which you are facing) and press the Relocate button in the menu. You can perform this adjustment as many times are you want.
Self Guided presentations
Most of the presentation will have a presenter and a live audience. But some presentations are designed to be viewed and experienced without a presenter. We call them Self guided presentations. In those presentation, will you need to start the presentation yourself and possibly move through slides on your own.
On a Self Guided presentation, the menu will look like this:
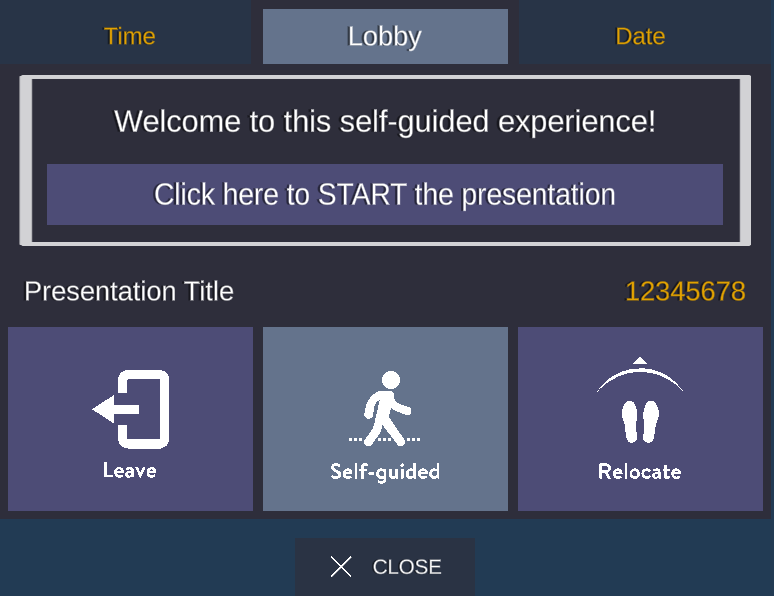
You can use the menu or do an AirTap/Pinch or press the trigger on the controllers to move through slides.