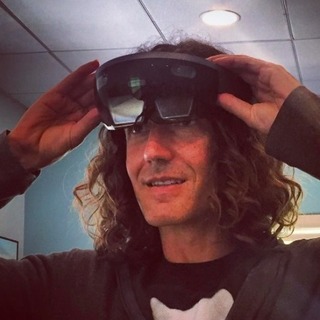
OpenHouseVR is a simple workflow for real estate agents to show a walkthrough of a house in virtual reality with a Google Cardboard VR headset.
We had a custom ThreeJS 360 House viewer app we created for the second version of OpenHouse VR. The first version was in Unity. We moved from Unity to JavaScript because at the time (mid 2015) Unity licensing was to pricey for a startup to build for Android + iOS.
The ThreeJS version of OpenHouse VR was great to get us some initial user validation and testing, but when we tried to scale out to more devices, it was prone to crashes and incompatibilities.
Our Javascript technology is now six months old and was used before WebVR-supported browsers came out on mobiles. It was in hybrid, which is hard to maintain and improve. Going with a well-supported framework now makes sense.
About A-Frame
A-Frame is a JavaScript framework dedicated to creating virtual reality experiences with HTML.
It uses an entity-based logic more like what we have in game engines like Unity or Unreal.
An entity in A-Frame is like a GameObject in Unity. You create it empty and add a series of components and properties. A-Frame provides a fairly basic foundation, complemented by community-contributed components like K-Frame.
Here is the "Hello World" of A-Frame:
<!DOCTYPE html>
<html>
  <head>
    <meta charset="utf-8">
    <title>Hello, World! - A-Frame</title>
    <meta name="description" content="Hello, World! - A-Frame">
    <script src="https://aframe.io/releases/0.3.2/aframe.min.js"></script>
  </head>
  <body>
    <a-scene>
      <a-box position="-1 0.5 -3" rotation="0 45 0" color="#4CC3D9"></a-box>
      <a-sphere position="0 1.25 -5" radius="1.25" color="#EF2D5E"></a-sphere>
      <a-cylinder position="1 0.75 -3" radius="0.5" height="1.5" color="#FFC65D"></a-cylinder>
      <a-plane position="0 0 -4" rotation="-90 0 0" width="4" height="4" color="#7BC8A4"></a-plane>
      <a-sky color="#ECECEC"></a-sky>
    </a-scene>
  </body>
</html>
We're not the only ones to port cool applications to A-Frame. Check out this cool project, A Painter -- a Web version of Tilt Brush.
OpenHouse VR in A-Frame
The A-Frame documentation in the component tutorial is a step-by-step tutorial to create a 360 picture viewer. To get it to work, you will also need the 360 Image Gallery boiler plate in GitHub.
It was pretty easy to get started -- we were up to speed in a couple of days with the main concept. From there we created a very basic proof of concept to evaluate the performances and see if it would perform better than our current version.
I started with a prefab to generate passages and a component to switch between rooms. I also started with an entity template and components. Entity templates feel like Prefabs in Unity.
  <script id="passage" type="text/nunjucks">
    <a-entity geometry="primitive: sphere; radius:1;"
           material="shader: flat; src: #room-91-preview"
           event-set__1="_event: mouseenter; scale: 1.5 1.5 1.5"
           event-set__2="_event: mouseleave; scale: 1 1 1"
           goto-room="on: click; target: #room-image; currentPassages: {{ current }}; nextPassages: {{ next }}; roomImage: {{ image }}">
    </a-entity>
  </script>
I then used this template to display the passages between each room.
 <a-entity class="passage-room-86" template="src: #passage; data: passage-data;"
            passage-data="current: .passage-room-86; next: .passage-room-87; image: #room-87"
            position="-20 2 -20" visible="false"></a-entity>

  <a-entity class="passage-room-87" template="src: #passage; data: passage-data;"
            passage-data="current: .passage-room-87; next: .passage-room-91; image: #room-91"
            position="-20 2 -20" visible="false"></a-entity>
The 360 images are set in the assets as:
<a-assets>
    <img id="room-87" src="/media/images/SAM_100_0087.jpg">
    <img id="room-87-preview" src="/media/images/SAM_100_0087-preview.jpg">
    <img id="room-89" src="/media/images/SAM_100_0089.jpg">
    <img id="room-91" src="/media/images/SAM_100_0091.jpg">
    <img id="room-91-preview" src="/media/images/SAM_100_0091-preview.jpg">
</a-assets>
Finallym the custom component goto-room will hide current room passages , display the next one and then change the <sky> source material to the next room.
AFRAME.registerComponent('goto-room', {
  schema: {
    on: 	        {type: 'string'},
    target:             {type: 'selector'},
    currentPassages: 	{type: 'string'},
    nextPassages: 	{type: 'string'},
    roomImage: 		{type: 'string'}
  },

  init: function () {
    var data = this.data;
    var el = this.el;

    el.addEventListener(data.on, function () {

      // hide current passages
			var current_list = document.querySelectorAll( data.currentPassages );
      for (var current of current_list) {
 				current.setAttribute('visible', false);
      }

      // display next passages
			var next_list = document.querySelectorAll( data.nextPassages );
      for (var next of next_list) {
 				next.setAttribute('visible', true);
      }

      // change the 360 image
      data.target.setAttribute('material', 'src', data.roomImage);

    });
  }
});
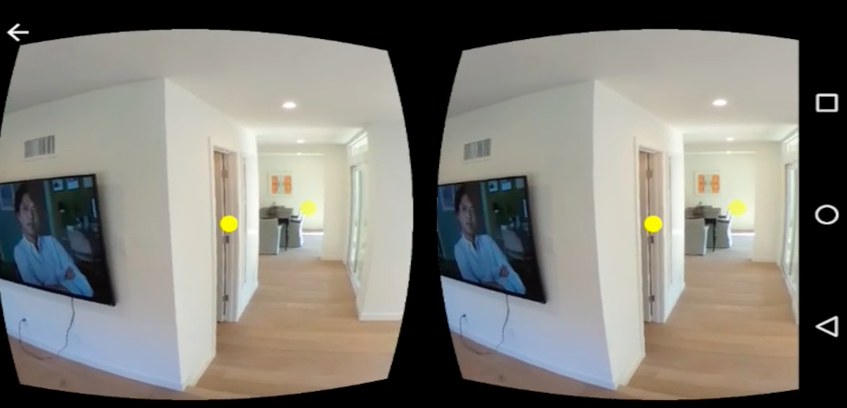
Here is how the proof of concept / test looks:
This simple house walkthrough is the work of a couple of days -- there is much more to do to bring this to the level of the current app. But this is very promising.
Using Firefox or any WebVR web browser as the main renderer of VR experiences naturally opens up a lot of possibilities, using all of the existing web standards for photo, video, and sockets, as well as integrating with existing API.